Forward Clutch Disassembly
INSPECT PACK CLEARANCE OF FORWARD CLUTCH
REMOVE FORWARD MULTIPLE DISC CLUTCH DISC
INSPECT FORWARD MULTIPLE DISC CLUTCH DISC
REMOVE FORWARD CLUTCH RETURN SPRING SUB-ASSEMBLY
INSPECT FORWARD CLUTCH RETURN SPRING SUB-ASSEMBLY
REMOVE FORWARD CLUTCH PISTON SUB-ASSEMBLY
REMOVE FORWARD CLUTCH PISTON O-RING
INSPECT FORWARD CLUTCH PISTON SUB-ASSEMBLY
REMOVE INPUT SHAFT OIL SEAL RING
Forward Clutch -- Disassembly |
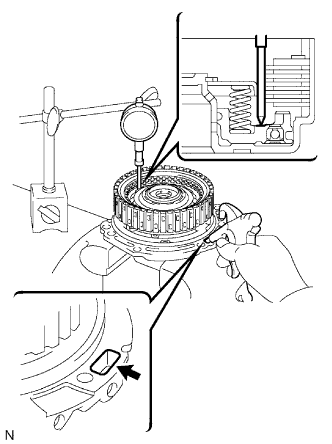
| 1. INSPECT PACK CLEARANCE OF FORWARD CLUTCH |
Install the forward clutch on the oil pump.
- NOTICE:
- Be careful not to damage the oil seal ring of oil pump.
Using a dial indicator, measure the forward clutch piston stroke while applying and releasing compressed air (392 kPa, 4.0 kgf/cm2, 57 psi).
- Standard piston stroke:
- 1.74 to 2.08 mm (0.0685 to 0.0819 in.)
If the piston stroke is less than the minimum, the parts may have been assembled incorrectly. Check and reassemble again.
If the clearance is not as specified, select another flange.
- HINT:
- There are 5 different flanges in thickness.
- Standard flange thickness:
No.
| Thickness
| No.
| Thickness
|
1
| 3.00 mm (0.1181 in.)
| 4
| 3.45 mm (0.1358 in.)
|
2
| 3.15 mm (0.1240 in.)
| 5
| 3.60 mm (0.1417 in.)
|
3
| 3.30 mm (0.1299 in.)
| -
| -
|
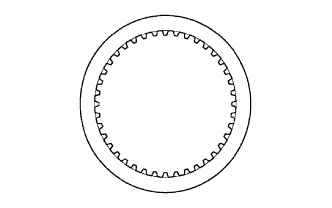
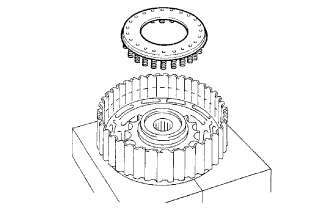
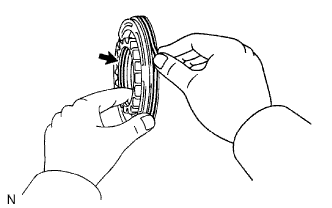
| 2. REMOVE FORWARD MULTIPLE DISC CLUTCH DISC |
Using a screwdriver, remove the snap ring.
Remove the flange, 5 discs and 5 plates.
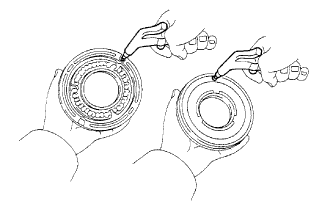
| 3. INSPECT FORWARD MULTIPLE DISC CLUTCH DISC |
Check to see if the sliding surface of the disc, plate and flange are worn or burnt.
If necessary, replace them.
- HINT:
- If the lining of the disc is peeling off or discolored, replace all discs.
- Before assembling new discs, soak them in ATF for at least 15 minutes.
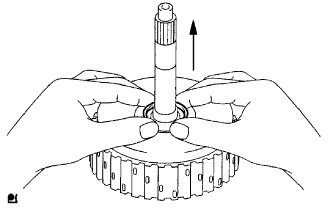
| 4. REMOVE FORWARD CLUTCH RETURN SPRING SUB-ASSEMBLY |
Place SST on the spring retainer and compress the return spring with a press.
- SST
- 09350-32014(09351-32070)
Using a snap ring expander, remove the snap ring.
Remove the piston return spring.
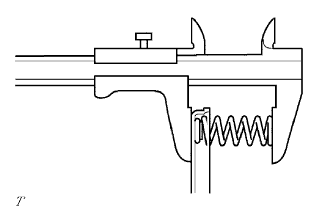
| 5. INSPECT FORWARD CLUTCH RETURN SPRING SUB-ASSEMBLY |
Using a vernier caliper, measure the free length of the spring together with the spring seat.
- Standard free length:
- 28.23 mm (1.1114 in.)
| 6. REMOVE FORWARD CLUTCH PISTON SUB-ASSEMBLY |
Place the forward clutch drum onto the oil pump.
Holding the forward clutch piston with your hand, apply compressed air (392 kPa, 4.0 kgf/cm2, 57 psi) to the oil pump to remove the forward clutch piston.
- HINT:
- When the piston is slanted and cannot be removed, remove it by pushing down the protruding side and applying compressed air again, or using need-nose pliers (with its tips wrapped in tape).
| 7. REMOVE FORWARD CLUTCH PISTON O-RING |
Remove the 2 O-rings.
| 8. INSPECT FORWARD CLUTCH PISTON SUB-ASSEMBLY |
Shake the piston to check that the check ball is not stuck.
Check that the value does not leak when applying low compressed air (392 kPa, 4.0 kgf/cm2, 57 psi).
| 9. REMOVE INPUT SHAFT OIL SEAL RING |