Direct Clutch Disassembly
INSPECT PACK CLEARANCE OF DIRECT CLUTCH
REMOVE DIRECT MULTIPLE DISC CLUTCH DISC
INSPECT DIRECT MULTIPLE DISC CLUTCH DISC
REMOVE DIRECT CLUTCH RETURN SPRING SUB-ASSEMBLY
Direct Clutch -- Disassembly |
| 1. INSPECT PACK CLEARANCE OF DIRECT CLUTCH |
Install the direct clutch and needle roller bearing on the transaxle rear cover.
Using a dial indicator, measure the forward clutch pack clearance while applying and releasing compressed air (392 kPa, 4.0 kgf/cm2, 57 psi)
- Standard pack clearance:
- 0.515 to 0.825 mm (0.0203 to 0.0324 in.)
If the pack clearance is not as specified, inspect the discs, plates and flange.
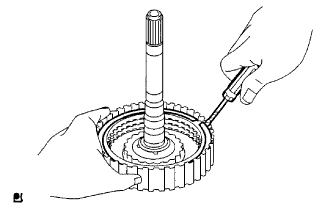
| 2. REMOVE DIRECT MULTIPLE DISC CLUTCH DISC |
Using a screwdriver, pry out the snap ring from the direct clutch drum.
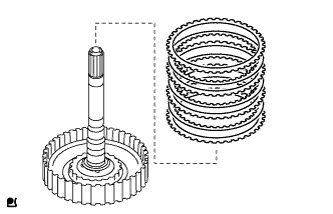
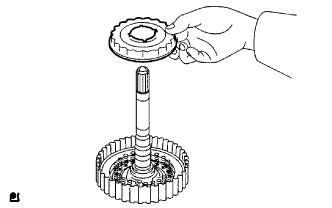
Remove the flange, 3 discs and 3 plates from the direct clutch drum.
| 3. INSPECT DIRECT MULTIPLE DISC CLUTCH DISC |
Check to see if the sliding surface of the disc, plate and flange are worn or burnt.
If necessary, replace them.
- HINT:
- If the lining of the disc is peeling off or discolored, or even if a part of the printed mark is defaced, replace all discs.
- Before assembling new discs, soak them in ATF for at least 15 minutes.
| 4. REMOVE DIRECT CLUTCH RETURN SPRING SUB-ASSEMBLY |
Place SST on the clutch balancer and compress the spring with a press.
- SST
- 09387-00020
Using a snap ring expander, remove the snap ring from the direct clutch drum.
- NOTICE:
- Stop the press when the spring sheet is lowered to the place 1 to 2 mm (0.039 to 0.078 in.) from the snap ring groove.
- This prevents the spring sheet from being deformed.
- Do not expand the snap ring excessively.
Remove the clutch balancer from the direct clutch drum.
Remove the piston return spring from the direct clutch drum.
Install the direct clutch drum on the transaxle rear cover.
Holding the direct clutch piston with your hand, apply compressed air (392 kPa, 4.0 kgf*cm2, 57 psi) to the transaxle rear cover to remove the direct clutch piston.