DISCONNECT CABLE FROM NEGATIVE BATTERY TERMINAL
REMOVE BACK DOOR CENTER GARNISH
REMOVE BACK DOOR SIDE GARNISH LH
REMOVE BACK DOOR SIDE GARNISH RH
REMOVE BACK DOOR TRIM BOARD ASSEMBLY
REMOVE REAR WIPER ARM AND BLADE ASSEMBLY
REMOVE REAR WIPER MOTOR GROMMET
REMOVE REAR WIPER MOTOR ASSEMBLY
Rear Wiper Motor -- Removal |
| 1. DISCONNECT CABLE FROM NEGATIVE BATTERY TERMINAL |
- NOTICE:
- w/ Navigation System (for HDD):
After the ignition switch is turned off, the HDD navigation system requires approximately a minute to record various types of memory and settings. As a result, after turning the ignition switch off, wait a minute or more before disconnecting the cable from the negative (-) battery terminal.
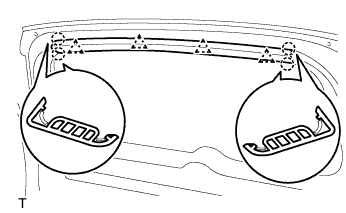
| 2. REMOVE BACK DOOR CENTER GARNISH |
Using a screwdriver, detach the 4 claws and 4 clips and remove the garnish.
- HINT:
- Tape the screwdriver tip before use.
| 3. REMOVE BACK DOOR SIDE GARNISH LH |
Using a screwdriver, detach the 2 claws and 2 clips and remove the garnish.
| 4. REMOVE BACK DOOR SIDE GARNISH RH |
- HINT:
- Use the same procedure described for the LH side.
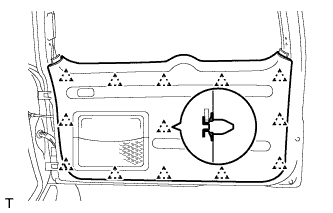
| 5. REMOVE BACK DOOR TRIM BOARD ASSEMBLY |
Using a screwdriver, detach the 13 clips and remove the trim board.
- HINT:
- Tape the screwdriver tip before use.
- If the screwdriver cannot reach the clips, pull on the lower trim to remove it.
Remove the 5 screws and the back door trim pocket.
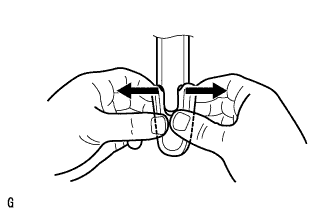
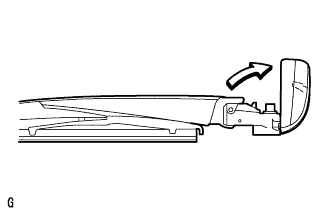
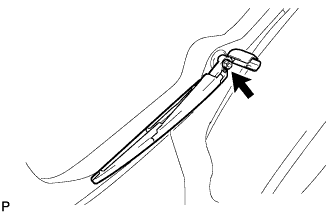
| 6. REMOVE REAR WIPER ARM AND BLADE ASSEMBLY |
Widen each end of the cap 5 mm (0.19in).
Lift the both widened ends of the cap.
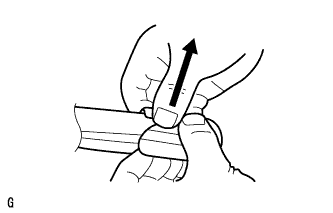
Rotate the cap. Fix the cap in place.
Remove the nut and arm and blade.
| 7. REMOVE REAR WIPER MOTOR GROMMET |
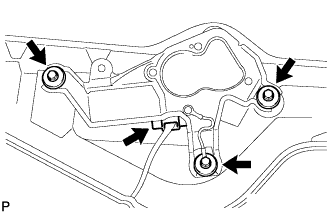
| 8. REMOVE REAR WIPER MOTOR ASSEMBLY |
Disconnect the connector.
Remove the 3 bolts and wiper motor.