Occupant Detection Sensor (For Manual Seat) Installation
INSTALL SEPARATE TYPE FRONT SEAT CUSHION PAD
INSTALL SEPARATE TYPE FRONT SEAT CUSHION COVER WITH PAD
INSTALL FRONT SEAT INNER CUSHION SHIELD
INSTALL FRONT SEAT CUSHION SHIELD
INSTALL RECLINING ADJUSTER RELEASE HANDLE
INSTALL VERTICAL ADJUSTING HANDLE
INSTALL VERTICAL ADJUSTER COVER
INSTALL VERTICAL SEAT ADJUSTER KNOB
INSTALL FRONT SEAT INNER BELT ASSEMBLY
INSTALL FRONT SEAT ASSEMBLY
INSTALL REAR OUTER SEAT TRACK COVER
INSTALL REAR INNER SEAT TRACK COVER
INSTALL FRONT OUTER SEAT TRACK BRACKET COVER
INSTALL FRONT INNER SEAT TRACK BRACKET COVER
INSTALL FRONT SEAT HEADREST ASSEMBLY
CONNECT CABLE TO NEGATIVE BATTERY TERMINAL
PERFORM INITIALIZATION
INSPECT SLIDE ADJUSTER LOCK
INSPECT SRS WARNING LIGHT
Occupant Detection Sensor (For Manual Seat) -- Installation |
| 1. INSTALL SEPARATE TYPE FRONT SEAT CUSHION PAD |
Using hog ring pliers, install the separate type front seat cushion pad with new hog rings.
- NOTICE:
- Be careful not to damage the cover.
- When installing the hog rings, take care to minimize wrinkles as much as possible.
Using hog ring pliers, install the separate type front seat cushion pad to the separate type front seat cushion cover with new hog rings.
- NOTICE:
- Be careful not to damage the cover.
- When installing the hog rings, take care to minimize wrinkles as much as possible.
| 2. INSTALL SEPARATE TYPE FRONT SEAT CUSHION COVER WITH PAD |
Install the hooks and front seat cushion cover with pad.
Passenger seat only:
Install the seat position airbag sensor connector.
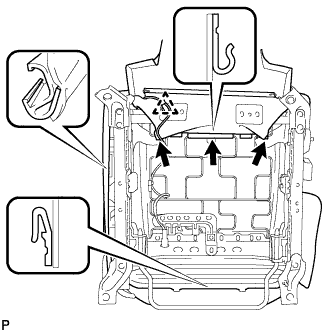
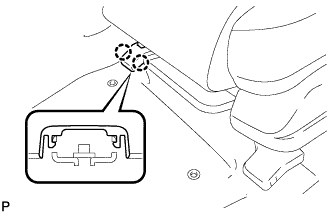
| 3. INSTALL FRONT SEAT INNER CUSHION SHIELD |
Engage the 2 claws and clip.
Install the front seat inner cushion shield with the screw.
| 4. INSTALL FRONT SEAT CUSHION SHIELD |
Engage the claw and clip.
Install the front seat cushion shield with the screw.
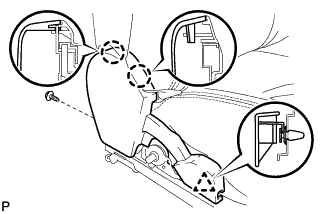
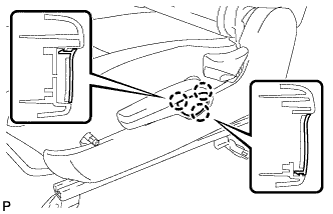
| 5. INSTALL RECLINING ADJUSTER RELEASE HANDLE |
Engage the claw and install the reclining adjuster release handle.
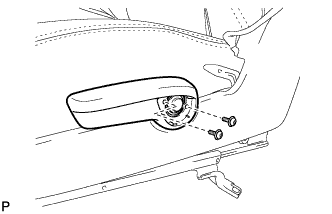
| 6. INSTALL VERTICAL ADJUSTING HANDLE |
Install the vertical adjusting handle with the 2 screws.
| 7. INSTALL VERTICAL ADJUSTER COVER |
Engage the 3 claws and install the vertical seat adjuster knob cap.
| 8. INSTALL VERTICAL SEAT ADJUSTER KNOB |
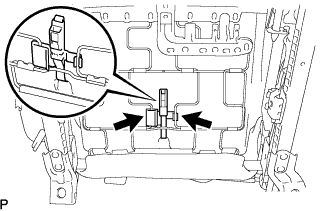
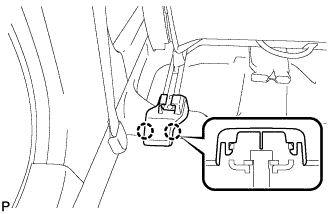
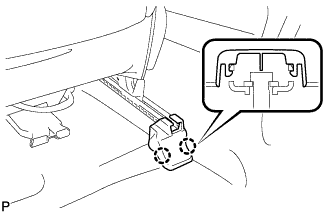
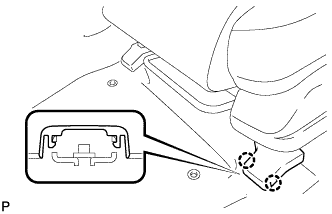
| 9. INSTALL FRONT SEAT INNER BELT ASSEMBLY |
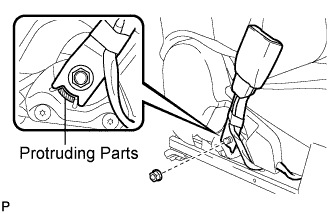
Install the front seat inner belt assembly with the nut.
- Torque:
- 42 N*m{428 kgf*cm, 31 ft.*lbf}
- NOTICE:
- Do not allow the anchor part of the front seat inner belt assembly to overlap the protruding parts of the front seat adjuster.
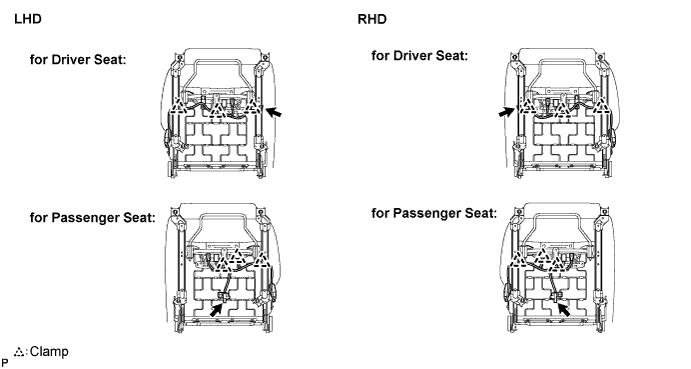
Connect the connector and attach the 3 clamps.
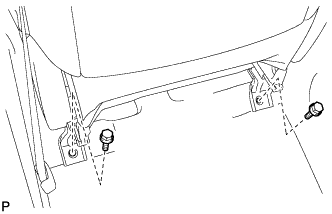
| 10. INSTALL FRONT SEAT ASSEMBLY |
Place the front seat assembly in the vehicle and align the adjuster pin with the hole on the vehicle side.
- NOTICE:
- When installing the passenger side front seat assembly, be careful not to step on the yaw rate sensor mounted on the floor under the seat.
Connect the connector.
Move the front seat assembly to the rearmost position by operating the slide handle.
- NOTICE:
- Check that the seat is locked.
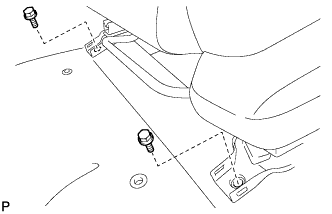
Temporarily install the front seat track bracket with the 2 bolts.
Move the front seat assembly fully forward by operating the slide handle.
- NOTICE:
- Check that the seat is locked.
Temporarily install the rear seat track bracket with the 2 bolts.
Move the front seat assembly to the rearmost position by operating the slide handle.
- NOTICE:
- Check that the seat is locked.
Fully tighten the 2 bolts on the front seat track bracket in the order of the inner side bolt and then the outer side bolt.
- Torque:
- 37 N*m{377 kgf*cm, 27 ft.*lbf}
Move the front seat assembly fully forward by operating the slide handle.
- NOTICE:
- Check that the seat is locked.
Fully tighten the 2 bolts on the rear seat track bracket in the order of the inner side bolt and then the outer side bolt.
- Torque:
- 37 N*m{377 kgf*cm, 27 ft.*lbf}
| 11. INSTALL REAR OUTER SEAT TRACK COVER |
Engage the 2 claws and install the rear outer seat track bracket cover.
| 12. INSTALL REAR INNER SEAT TRACK COVER |
Engage the 2 claws and install the rear inner seat track bracket cover.
| 13. INSTALL FRONT OUTER SEAT TRACK BRACKET COVER |
Engage the 2 claws and install the front outer seat track bracket cover.
| 14. INSTALL FRONT INNER SEAT TRACK BRACKET COVER |
Engage the 2 claws and install the front inner seat track bracket cover.
| 15. INSTALL FRONT SEAT HEADREST ASSEMBLY |
| 16. CONNECT CABLE TO NEGATIVE BATTERY TERMINAL |
| 17. PERFORM INITIALIZATION |
- HINT:
- Some systems need initialization after reconnecting the cable to the negative battery terminal. (Click here)
| 18. INSPECT SLIDE ADJUSTER LOCK |
| 19. INSPECT SRS WARNING LIGHT |
Inspect the SRS warning light. (Click here)