Steering Pad Switch Installation
INSTALL STEERING PAD SWITCH ASSEMBLY
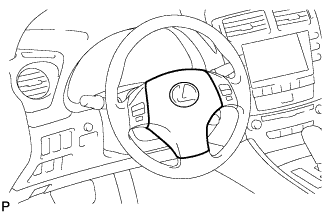
INSTALL STEERING PAD
INSTALL LOWER NO. 3 STEERING WHEEL COVER
INSTALL LOWER NO. 2 STEERING WHEEL COVER
CONNECT CABLE TO NEGATIVE BATTERY TERMINAL
PERFORM INITIALIZATION
INSPECT STEERING PAD
INSPECT SRS WARNING LIGHT
Steering Pad Switch -- Installation |
| 1. INSTALL STEERING PAD SWITCH ASSEMBLY |
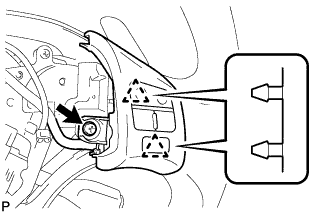
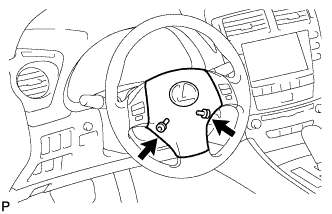
Engage the 2 claws and install the steering pad switch.
Install the screw.
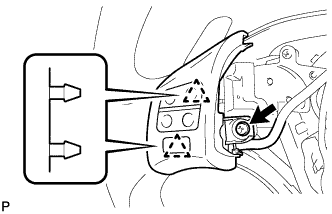
Engage the 2 claws and install the steering pad switch.
Install the screw.
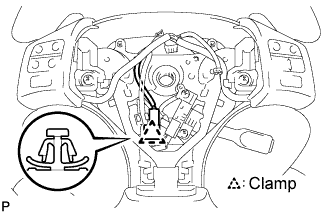
Connect the connector to the spiral cable.
Connect the cruise connector and install the connector clamp.
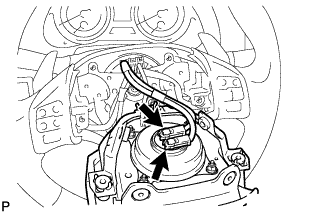
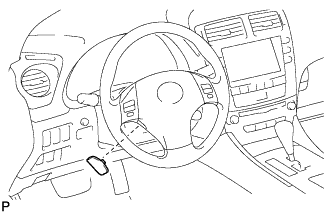
Support the steering pad with one hand as shown in the illustration.
Connect the 2 connectors to the steering pad.
- NOTICE:
- When handling the airbag connector, take care not to damage the airbag wire harness.
Connect the horn connector.
Confirm that the circumference groove of the "torx" screw fits in the screw case, and place the steering pad onto the steering wheel assembly.
Using a "torx" socket wrench (T30), tighten the 2 "torx" screws.
- Torque:
- 8.8 N*m{90 kgf*cm, 78 in.*lbf}
| 3. INSTALL LOWER NO. 3 STEERING WHEEL COVER |
Install the steering wheel No.3 cover lower.
| 4. INSTALL LOWER NO. 2 STEERING WHEEL COVER |
Install the steering wheel No.2 cover lower.
| 5. CONNECT CABLE TO NEGATIVE BATTERY TERMINAL |
| 6. PERFORM INITIALIZATION |
- NOTICE:
- Some systems need initialization when disconnecting the cable from the negative battery terminal (Click here).
With the steering pad installed on the vehicle, perform a visual check. If there are any defects as mentioned below, replace the steering pad with a new one:
- Cuts, minute cracks or marked discoloration on the steering pad top surface or in the grooved portion.
Make sure that the horn sounds.
- HINT:
- If the horn does not sound, inspect the horn system (Click here).
| 8. INSPECT SRS WARNING LIGHT |
(Click here)