Compressor And Pulley (For 2Ad-Fhv) Removal
REMOVE COOL AIR INTAKE DUCT SEAL
REMOVE NO. 1 AIR CLEANER INLET
REMOVE NO. 1 ENGINE COVER
DISCHARGE REFRIGERANT FROM REFRIGERATION SYSTEM
REMOVE UNDER ENGINE COVER
REMOVE OUTLET RADIATOR HOSE
REMOVE V-RIBBED BELT
REMOVE WATER HOSE CLAMP
REMOVE NO. 1 COOLER REFRIGERANT SUCTION HOSE
REMOVE DISCHARGE HOSE SUB-ASSEMBLY
REMOVE COMPRESSOR ASSEMBLY WITH PULLEY
Compressor And Pulley (For 2Ad-Fhv) -- Removal |
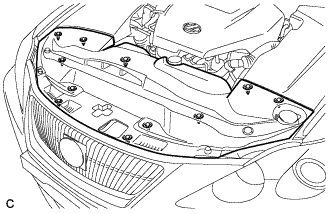
| 1. REMOVE COOL AIR INTAKE DUCT SEAL |
Remove the 11 clips and intake duct seal.
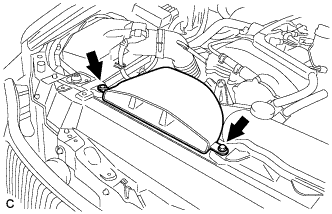
| 2. REMOVE NO. 1 AIR CLEANER INLET |
Remove the bolt, clip and inlet air cleaner.
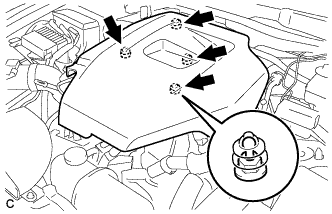
| 3. REMOVE NO. 1 ENGINE COVER |
Remove the No. 1 engine cover.
| 4. DISCHARGE REFRIGERANT FROM REFRIGERATION SYSTEM |
Start up the engine.
Turn the A/C switch on.
Operate the cooler compressor at an engine rpm of approximately 1,000 for 5 to 6 minutes to circulate the refrigerant and collect compressor oil remaining in each component into the cooler compressor as much as possible.
Stop the engine.
Using SST, let the refrigerant gas out.
- SST
- 07110-58060(07117-58060,07117-58070,07117-58080,07117-58090,07117-78050,07117-88060,07117-88070,07117-88080)
| 5. REMOVE UNDER ENGINE COVER |
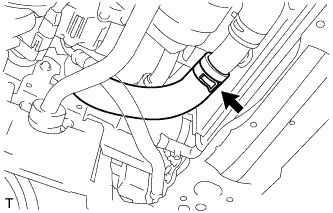
| 6. REMOVE OUTLET RADIATOR HOSE |
Loosen the clip and disconnect the radiator outlet hose.
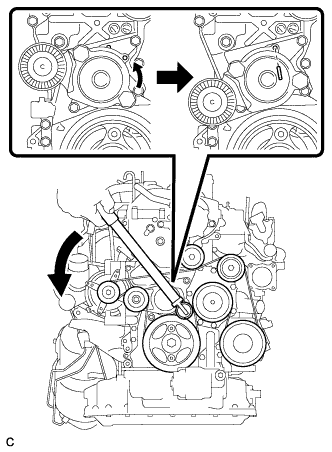
Release the belt tension by turning the belt tensioner counterclockwise, and remove the V-ribbed belt from the belt tensioner.
While turning the belt tensioner counterclockwise, align its holes, and then insert a 5 mm (0.20 in.) bar into the holes to hold the belt tensioner.
| 8. REMOVE WATER HOSE CLAMP |
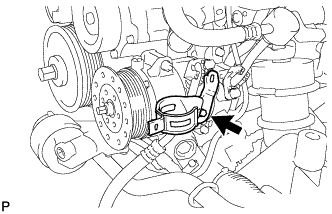
Remove the bolt and water hose clamp from the compressor.
| 9. REMOVE NO. 1 COOLER REFRIGERANT SUCTION HOSE |
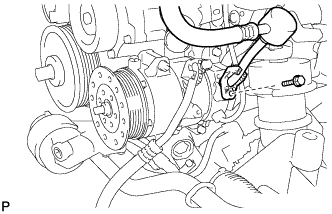
Remove the bolt and disconnect the No. 1 cooler refrigerant suction hose from the compressor.
Remove the O-ring from the cooler refrigerant suction hose.
- NOTICE:
- Seal the openings of the disconnected parts using vinyl tape to prevent moisture and foreign matter from entering.
| 10. REMOVE DISCHARGE HOSE SUB-ASSEMBLY |
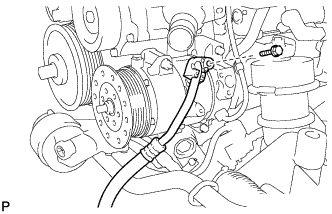
Remove the bolt and disconnect the discharge hose from the compressor.
Remove the O-ring from the discharge hose sub-assembly.
- NOTICE:
- Seal the openings of the disconnected parts using vinyl tape to prevent moisture and foreign matter from entering.
| 11. REMOVE COMPRESSOR ASSEMBLY WITH PULLEY |
Disconnect the magnetic clutch connector.
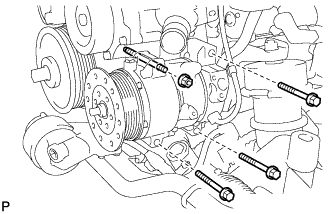
Remove the 3 bolts and nut.
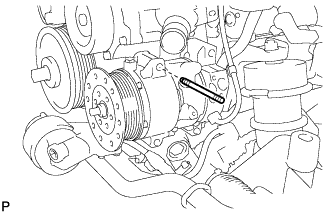
Using a "Torx" socket wrench (E8), remove the stud bolt and the compressor assembly with pulley.
