Clutch Master Cylinder -- Removal |
- HINT:
- Use the same procedures for the RHD and LHD.
- The procedures listed below are for the LHD.
| 1. PRECAUTION |
| 2. DISCONNECT CABLE FROM NEGATIVE BATTERY TERMINAL |
- CAUTION:
- Wait for 90 seconds after disconnecting the cable to prevent airbag deployment (Click here).
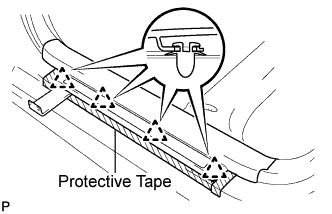
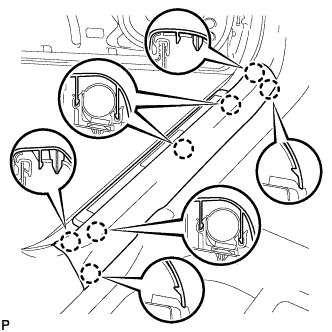
| 3. REMOVE FRONT DOOR SCUFF PLATE (w/o Illumination) |
Put protective tape around the front door scuff plate.
 |
Using a moulding remover, disengage the 4 clips.
Disengage the 7 claws and remove the front door scuff plate LH.
 |
| 4. REMOVE FRONT DOOR SCUFF PLATE (w/ Illumination) |
Put protective tape around the front door scuff plate.
|
Using a moulding remover, disengage the 4 clips.
Disengage the 7 claws and remove the front door scuff plate LH.
|
Disconnect the connector.
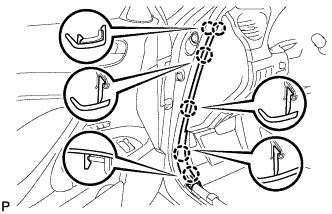
| 5. REMOVE FRONT DOOR OPENING TRIM COVER |
Disengage the 6 claws and remove the front door opening trim cover LH.
 |
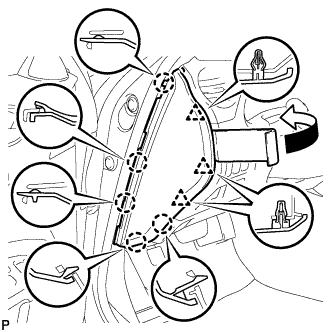
| 6. REMOVE SIDE INSTRUMENT PANEL |
Using a moulding remover, disengage the 5 claws and 3 clips, and then remove the side instrument panel LH.
 |
| 7. REMOVE NO. 1 INSTRUMENT PANEL UNDER COVER SUB-ASSEMBLY |
Remove the 2 screws <E>.
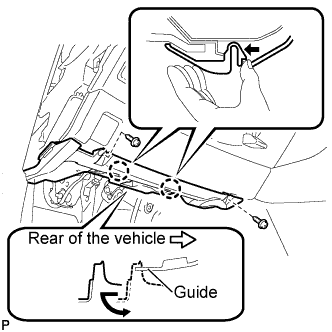 |
Push the 2 claws in the direction indicated by the arrow to disengage them.
Remove the No. 1 instrument panel under cover sub-assembly from the guide as shown in the illustration and pull the cover toward the rear of the vehicle.
Disconnect the connectors and remove the No. 1 instrument panel under cover sub-assembly.
| 8. REMOVE LOWER INSTRUMENT PANEL FINISH PANEL SUB-ASSEMBLY |
Disengage the 7 clips.
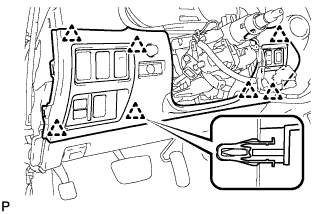 |
Disconnect the connectors and remove the lower instrument panel finish panel sub-assembly.
| 9. REMOVE DRIVER SIDE KNEE AIRBAG ASSEMBLY |
Remove the 4 bolts and driver side knee airbag assembly.
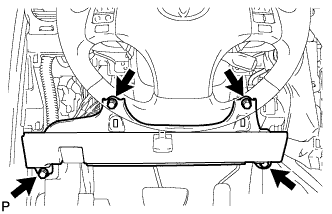 |
Disconnect the connector.
- NOTICE:
- When handling the airbag connector, take care not to damage the airbag wire harness.
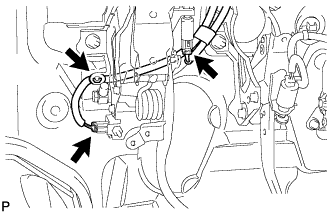
| 10. DISCONNECT WIRE HARNESS (for LHD) |
Disconnect the 3 connectors and clamp.
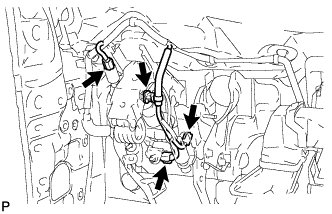 |
| 11. DISCONNECT WIRE HARNESS (for RHD) |
Disconnect the 2 connectors and clamp.
 |
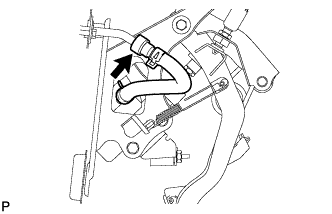
| 12. DISCONNECT CLUTCH RESERVOIR TUBE (for LHD) |
Disconnect the clutch reservoir tube.
- HINT:
- Use a container to catch the fluid.
 |
| 13. DISCONNECT CLUTCH RESERVOIR TUBE (for RHD) |
Disconnect the clutch reservoir tube.
- HINT:
- Use a container to catch the fluid.
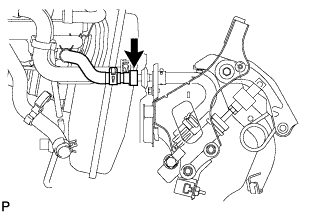 |
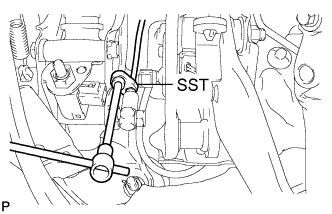
| 14. DISCONNECT CLUTCH LINE |
Using SST, disconnect the clutch line from the clutch master cylinder.
- SST
- 09023-00101
- HINT:
- Use a container to catch the fluid.
 |
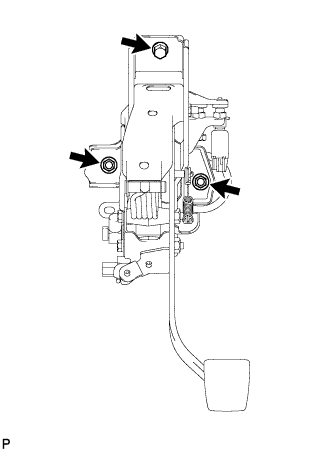
| 15. REMOVE CLUTCH PEDAL SUPPORT SUB-ASSEMBLY (for LHD) |
Remove the 2 nuts, bolt and clutch pedal support.
 |
| 16. REMOVE CLUTCH PEDAL SUPPORT SUB-ASSEMBLY (for RHD) |
Remove the 2 nuts, bolt and clutch pedal support.
 |
| 17. REMOVE CLUTCH START SWITCH ASSEMBLY |
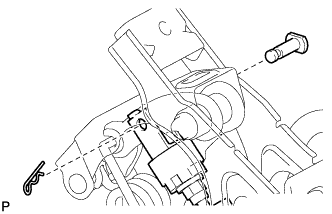
| 18. REMOVE CLUTCH MASTER CYLINDER PUSH ROD CLEVIS PIN |
Remove the clip and pin.
 |
| 19. REMOVE CLUTCH MASTER CYLINDER ASSEMBLY (for LHD) |
Remove the clutch reservoir tube.
 |
Remove the 2 bolts and clutch master cylinder assembly.
| 20. REMOVE CLUTCH MASTER CYLINDER ASSEMBLY (for RHD) |
Remove the clutch reservoir tube.
 |
Remove the 2 bolts and clutch master cylinder assembly.