Headlight Washer Actuator Installation
INSTALL HEADLIGHT CLEANER HOSE
INSTALL HEADLIGHT WASHER ACTUATOR SUB-ASSEMBLY
INSTALL HEADLIGHT ASSEMBLY
INSTALL FRONT BUMPER COVER
INSTALL FRONT FENDER LINER LH
INSTALL FRONT FENDER LINER RH
INSTALL ENGINE UNDER COVER
INSTALL COOL AIR INTAKE DUCT SEAL
CONNECT CABLE TO NEGATIVE BATTERY TERMINAL
PERFORM INITIALIZATION
Headlight Washer Actuator -- Installation |
- HINT:
- Use the same procedures for both the RH and LH sides.
- The procedures listed below are for the LH side.
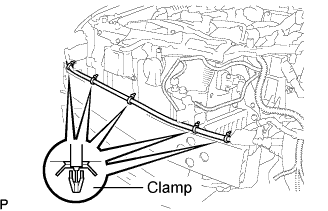
| 1. INSTALL HEADLIGHT CLEANER HOSE |
Attach the 5 clamps and install the hose to the front bumper reinforcement.
Connect the hose to the headlight cleaner motor and pump.
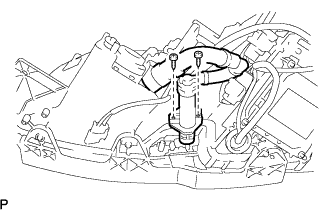
| 2. INSTALL HEADLIGHT WASHER ACTUATOR SUB-ASSEMBLY |
Install the headlight washer actuator to the headlight with the 2 screws.
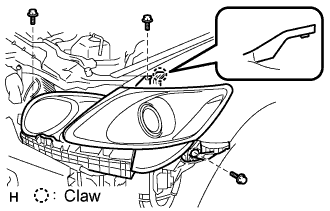
| 3. INSTALL HEADLIGHT ASSEMBLY |
Attach the claw and install the headlight with the 3 screws.
w/ Headlight cleaner:
Connect the hose.
Connect the connector as shown in the illustration.
| 4. INSTALL FRONT BUMPER COVER |
Connect the ultrasonic sensor connector.
Attach the 3 claws on the LH side.
Attach the 3 claws on the RH side.
Install the bumper cover with the 2 clips, 6 screws and 5 bolts.
| 5. INSTALL FRONT FENDER LINER LH |
Install the fender liner with the 2 clips.
| 6. INSTALL FRONT FENDER LINER RH |
- HINT:
- Use the same procedures described for the LH side.
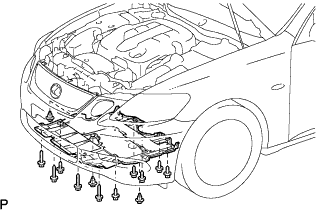
| 7. INSTALL ENGINE UNDER COVER |
Install the under cover with the 3 clips and 10 screws.
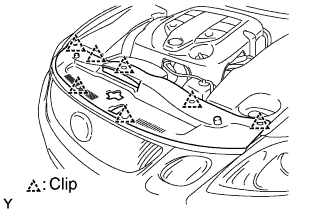
| 8. INSTALL COOL AIR INTAKE DUCT SEAL |
Install the intake duct seal with the 7 clips.
| 9. CONNECT CABLE TO NEGATIVE BATTERY TERMINAL |
| 10. PERFORM INITIALIZATION |
Perform initialization (Click here).
- NOTICE:
- Certain systems need to be initialized after disconnecting and reconnecting the cable from the negative (-) battery terminal.