Body Electrical. Lexus Gs430, Gs300. Uzs190 Grs190
Audio Visual. Lexus Gs430, Gs300. Uzs190 Grs190
Front No. 1 Speaker -- Removal |
- HINT:
- Use the same procedures for the LH side and RH side.
- The procedures listed below are for the LH side.
| 1. DISCONNECT CABLE FROM NEGATIVE BATTERY TERMINAL |
- CAUTION:
- Wait at least 90 seconds after disconnecting the cable from the negative (-) battery terminal to prevent airbag and seat belt pretensioner activation.
| 2. REMOVE FRONT DOOR INSIDE HANDLE BEZEL PLUG LH |
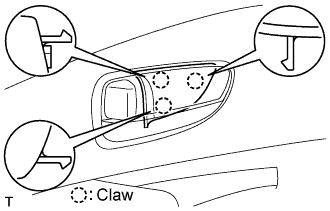 |
Using a screwdriver, detach the 3 claws and remove the bezel plug.
- HINT:
- Tape the screwdriver tip before use.
| 3. REMOVE FRONT DOOR TRIM BOARD SUB-ASSEMBLY LH |
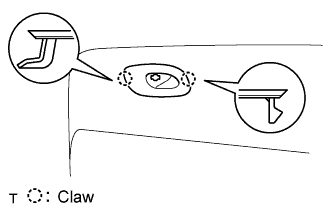 |
Detach the 2 claws and remove the trim lower cover.
Disconnect the connector.
Remove the 2 screws.
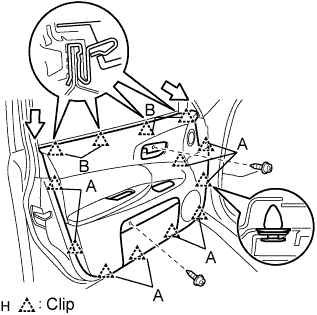 |
Detach the 9 clips labeled A, and remove the trim together with the weather strip.
Detach the 4 clips labeled B to separate the weatherstrip and trim.
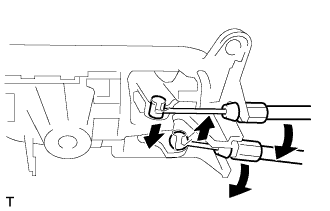
Disconnect the 2 cables from the inside handle.
 |
| 4. REMOVE FRONT NO. 1 SPEAKER ASSEMBLY |
Disconnect the connector.
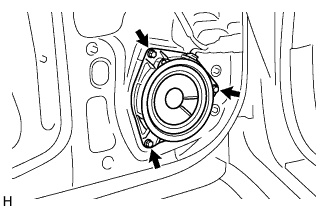 |
Remove the 3 screws and speaker.
- HINT:
- Do not touch the cone part of the speaker.