Floor Shift Assembly -- Removal |
| 1. DISCONNECT CABLE FROM NEGATIVE BATTERY TERMINAL |
| 2. REMOVE FRONT CONSOLE UPPER PANEL GARNISH |
 |
Using a clip remover, detach the claws and remove the garnish.
- HINT:
- Tape the clip remover tip before use.
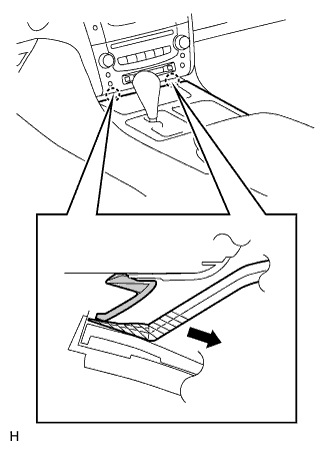
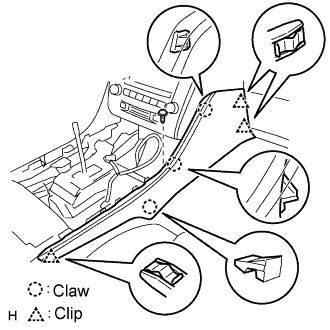
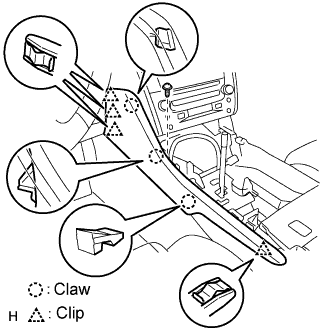
| 3. REMOVE CONSOLE UPPER PANEL ASSEMBLY |
 |
Twist the shift lever knob in the direction indicated by the arrow and remove it.
Using a screwdriver, detach the 9 clips.
- HINT:
- Tape the screwdriver tip before use.
 |
Remove the ash receptacle and then disconnect the connector.
| 4. REMOVE INSTRUMENT PANEL FINISH PANEL END RH |
 |
Remove the screw.
Using a screwdriver, detach the 3 clips and 3 claws.
- HINT:
- Tape the screwdriver tip before use.
Remove the finish panel end.
| 5. REMOVE INSTRUMENT PANEL FINISH PANEL END LH |
 |
Remove the screw.
Using a screwdriver, detach the 4 clips and 3 claws.
- HINT:
- Tape the screwdriver tip before use.
Remove the finish panel end.
| 6. REMOVE CONSOLE BOX PLATE |
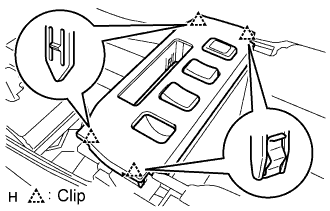 |
Using a screwdriver, detach the 4 clips.
- HINT:
- Tape the screwdriver tip before use.
Remove the console box plate and then disconnect the connector.
| 7. REMOVE CONSOLE BOX REGISTER ASSEMBLY |
 |
Using a screwdriver, detach the 4 clips and remove the register.
- HINT:
- Tape the screwdriver tip before use.
| 8. REMOVE CONSOLE BOX |
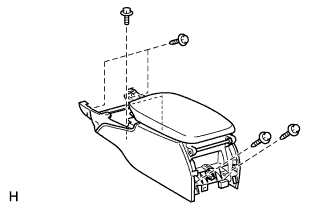 |
Remove the 4 bolts and 2 screws.
Remove the console box and then disconnect the connector.
| 9. REMOVE NO.2 CONSOLE BOX DUCT |
Remove the 2 clips and console box duct.
 |
| 10. REMOVE FRONT EXHAUST PIPE ASSEMBLY |
| 11. REMOVE FRONT FLOOR HEAT INSULATOR NO.1 |
Remove the 4 nuts, grommet and front floor heat insulator No.1.
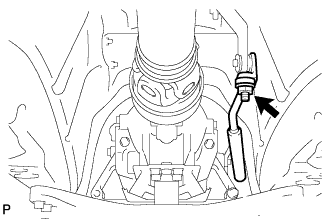
| 12. SEPARATE FLOOR SHIFT GEAR SHIFTING ROD SUB-ASSEMBLY |
Remove the nut and separate the floor shift gear shifting rod sub-assembly.
 |
| 13. REMOVE FLOOR SHIFT ASSEMBLY |
Disconnect the connectors.
Remove the 4 bolts.
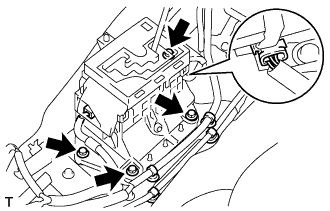 |
Remove the floor shift assembly.