Vehicle Exterior. Hilux. Tgn26, 36 Kun25, 26, 35, 36 Ggn25
Exterior Panels Trim. Hilux. Tgn26, 36 Kun25, 26, 35, 36 Ggn25
Rear Door Belt Moulding -- Removal |
- HINT:
- Use the same procedure for the RH and LH sides.
- The procedure listed below is for the LH side.
| 1. REMOVE REAR POWER WINDOW REGULATOR SWITCH ASSEMBLY WITH REAR DOOR ARMREST BASE PANEL (w/ Power Window) |
- NOTICE:
- When disconnecting the cable, some systems need to be initialized after the cable is reconnected (HILUX_TGN26 RM000004QR3003X.html).
| 2. REMOVE REAR DOOR WINDOW REGULATOR HANDLE ASSEMBLY (w/o Power Window) |
Insert a clip remover between the plate and trim board.
- HINT:
- Tape the clip remover tip before use.
Text in Illustration *1 Protective Tape
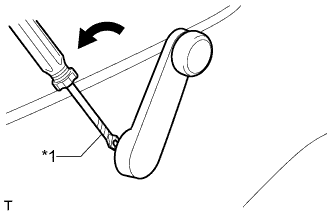 |
Turn the handle clockwise to remove the snap ring, rear door window regulator handle and plate.
| 3. REMOVE DOOR PULL HANDLE |
Remove the screw and door pull handle.
 |
| 4. REMOVE REAR DOOR TRIM BOARD SUB-ASSEMBLY LH |
Remove the clip and screw.
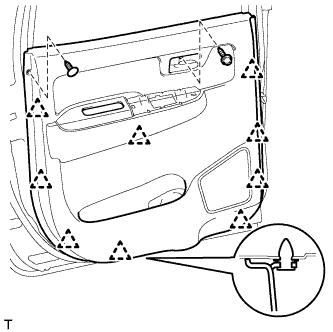 |
Detach the 9 clips and remove the rear door trim board.
| 5. REMOVE REAR DOOR OUTER GLASS WEATHERSTRIP LH |
Put protective tape around the rear door outer glass weatherstrip.
Text in Illustration *1 Protective Tape
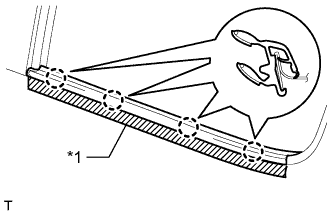 |
Detach the 4 claws and remove the rear door outer glass weatherstrip.