Side Moulding -- Removal |
- HINT:
- Use the same procedure for the RH and LH sides.
- The procedure listed below is for the LH side.
| 1. REMOVE RADIATOR GRILLE |
Put protective tape around the radiator grille.
Text in Illustration *1 Protective Tape
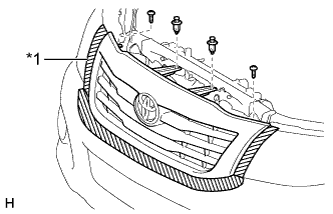 |
Remove the 2 clips and 2 screws.
Detach the 6 claws and remove the radiator grille.
 |
| 2. REMOVE FRONT BUMPER COVER |
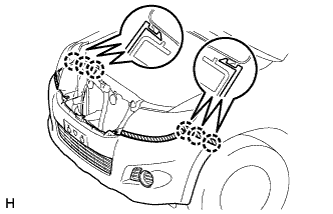
Remove the 3 clips and 6 screws.
 |
Put protective tape around the front bumper cover.
Text in Illustration *1 Protective Tape
 |
Remove the 2 bolts, 2 screws and 5 clips.
Detach the 6 claws and remove the front bumper cover.
 |
w/ Fog Light:
Disconnect the 2 fog light connectors.
| 3. REMOVE FRONT FENDER MUDGUARD LH (w/ Front Fender Mudguard) |
w/o Outside Moulding:
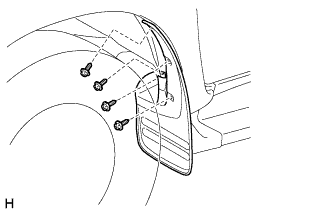
Remove the 3 screws and front fender mudguard.
 |
w/ Outside Moulding:
Remove the 4 screws and front fender mudguard.
 |
| 4. REMOVE FRONT WHEEL OPENING EXTENSION LH |
w/o Front Fender Mudguard:
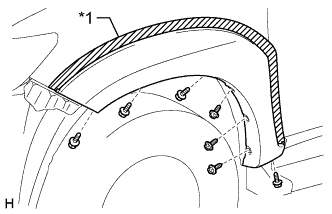
Put protective tape around the front wheel opening extension.
Text in Illustration *1 Protective Tape Remove the 7 screws.
 |
w/ Front Fender Mudguard:
Put protective tape around the front wheel opening extension.
Text in Illustration *1 Protective Tape Remove the 4 screws.
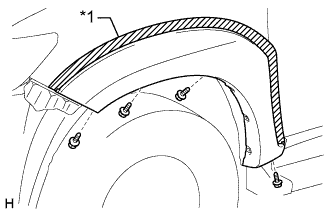 |
Detach the 8 clips and remove the front wheel opening extension.
 |
Remove the 8 clips from the vehicle body.
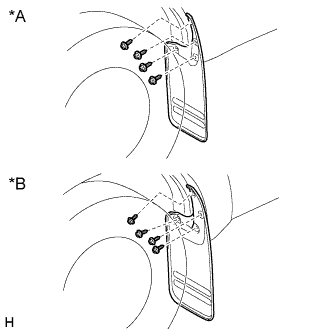
| 5. REMOVE REAR QUARTER PANEL MUDGUARD LH |
Remove the 4 screws and rear quarter panel mudguard.
Text in Illustration *A w/o Outside Moulding *B w/ Outside Moulding
 |
| 6. REMOVE REAR NO. 1 WHEEL OPENING EXTENSION SUB-ASSEMBLY LH |
Put protective tape around the rear No. 1 wheel opening extension.
Text in Illustration *1 Protective Tape
 |
Remove the 5 screws.
Detach the 11 clips and remove the No. 1 rear wheel opening extension.
 |
Remove the 11 clips from the vehicle body.