Back-Up Light Switch Removal
REMOVE NO. 1 ENGINE COVER SUB-ASSEMBLY
REMOVE AIR CLEANER CAP SUB-ASSEMBLY
REMOVE AIR CLEANER CASE
DISCONNECT WIRE HARNESS
REMOVE BACK-UP LIGHT SWITCH ASSEMBLY
Back-Up Light Switch -- Removal |
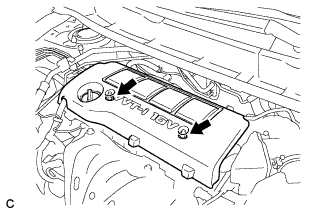
| 1. REMOVE NO. 1 ENGINE COVER SUB-ASSEMBLY |
Remove the 2 nuts and No. 1 engine cover sub-assembly.
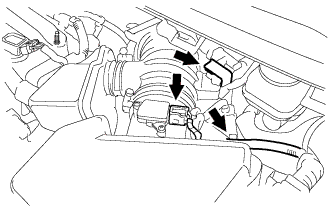
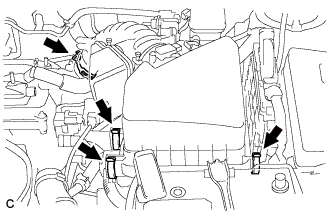
| 2. REMOVE AIR CLEANER CAP SUB-ASSEMBLY |
Disconnect the mass air flow meter connector.
Separate the 2 wire harness clamps.
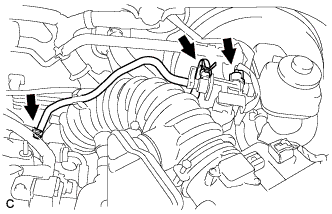
Disconnect the No. 1 vacuum switching valve connector and the 2 vacuum hoses.
Disconnect the ventilation hose.
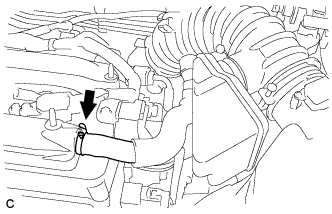
Loosen the No. 1 air cleaner hose clamp, release the 3 air cleaner assembly clamps and remove the air cleaner cap sub-assembly with No. 1 hose.
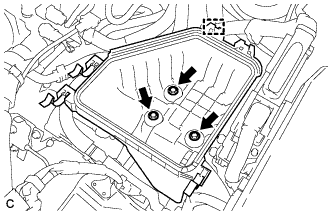
| 3. REMOVE AIR CLEANER CASE |
Remove the air cleaner filter element.
Disconnect the clamp of the engine wire.
Remove the 3 bolts and air cleaner case.
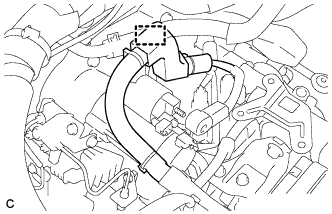
| 4. DISCONNECT WIRE HARNESS |
Disconnect the terminal 50 connector from the starter assembly.
Remove the nut and disconnect the wire harness from terminal 30.
Disconnect the wire harness clamp.
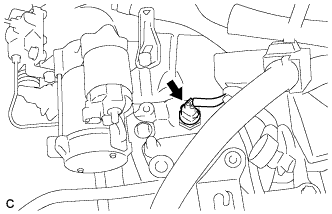
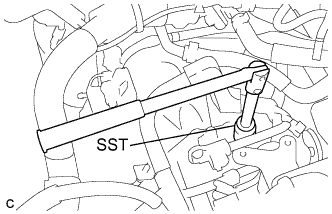
| 5. REMOVE BACK-UP LIGHT SWITCH ASSEMBLY |
Disconnect the back-up light switch connector.
Using SST, remove the back-up light switch and gasket from the transaxle case.
- SST
- 09817-16011