Back-Up Light Switch Installation
INSTALL BACK-UP LIGHT SWITCH ASSEMBLY
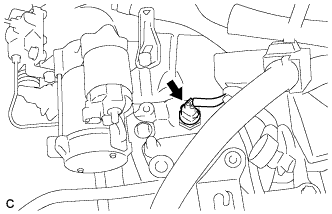
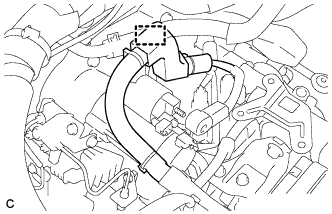
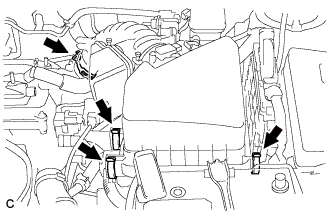
CONNECT WIRE HARNESS
INSTALL AIR CLEANER CASE
INSTALL AIR CLEANER CAP SUB-ASSEMBLY
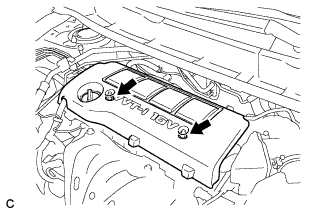
INSTALL NO. 1 ENGINE COVER SUB-ASSEMBLY
Back-Up Light Switch -- Installation |
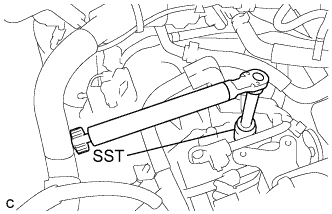
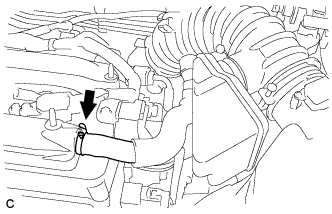
| 1. INSTALL BACK-UP LIGHT SWITCH ASSEMBLY |
Using SST, install the back-up light switch and a new gasket to the transaxle case.
- SST
- 09817-16011
- Torque:
- 40 N*m{410 kgf*cm, 30 ft.*lbf}
Connect the back-up light switch connector.
Connect the wire harness to the wire harness clamp.
Connect the terminal 50 connector to the starter assembly.
Connect the wire harness to terminal 30 and install the nut. Then, attach the terminal cap.
- Torque:
- 9.8 N*m{100 kgf*cm, 87 in.*lbf}
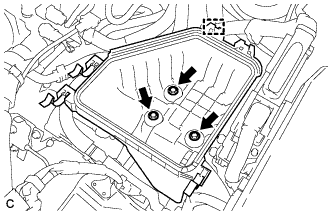
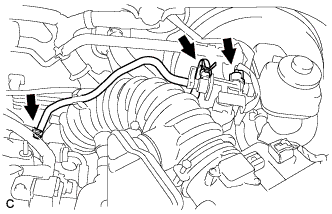
| 3. INSTALL AIR CLEANER CASE |
Install the air cleaner case with the 3 bolts.
- Torque:
- 7.0 N*m{71 kgf*cm, 62 in.*lbf}
Install the engine wire clamp to the air cleaner case.
Install the air cleaner filter element.
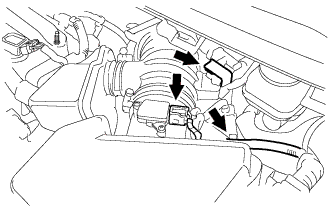
| 4. INSTALL AIR CLEANER CAP SUB-ASSEMBLY |
Install the air cleaner cap sub-assembly with hose and lock the 3 clamps.
Tighten the air cleaner hose clamp.
Connect the ventilation hose.
Connect the 2 vacuum hoses and No. 1 vacuum switching valve connector.
Connect the 2 wire harness clamps and the mass air flow meter connector.
| 5. INSTALL NO. 1 ENGINE COVER SUB-ASSEMBLY |
Install the No. 1 engine cover sub-assembly with the 2 nuts.