REMOVE NO. 1 INSTRUMENT PANEL BRACE SUB-ASSEMBLY (for Manual Air Conditioning System)
REMOVE NO. 1 INSTRUMENT PANEL BRACE SUB-ASSEMBLY (for Automatic Air Conditioning System)
REMOVE INSTRUMENT PANEL REINFORCEMENT ASSEMBLY (for Manual Air Conditioning System)
REMOVE INSTRUMENT PANEL REINFORCEMENT ASSEMBLY (for Automatic Air Conditioning System)
Air Conditioning Unit -- Removal |
- HINT:
- Before disconnecting the cable, set the air conditioning control switch to DEF-MODE. (for Automatic Air Conditioning System)
| 1. RECOVER REFRIGERANT FROM REFRIGERATION SYSTEM |
Start up the engine.
Turn the A/C switch on.
Operate the cooler compressor at an engine speed of approximately 1000 rpm for 5 to 6 minutes to circulate the refrigerant. This causes most of the compressor oil from the various components of the A/C system to collect in the A/C compressor.
Stop the engine.
Recover the refrigerant from the A/C system using a refrigerant recovery unit.
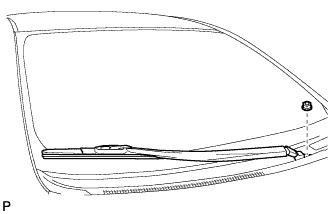
| 2. REMOVE FRONT WIPER ARM HEAD CAP |
Remove the 2 front wiper arm head caps.
 |
| 3. REMOVE FRONT WIPER ARM AND BLADE ASSEMBLY LH |
Remove the nut and the front wiper arm and blade assembly LH.
 |
| 4. REMOVE FRONT WIPER ARM AND BLADE ASSEMBLY RH |
Remove the nut and the front wiper arm and blade assembly RH.
 |
| 5. REMOVE HOOD TO COWL TOP SEAL |
Disengage the 7 clips and remove the hood to cowl top seal.
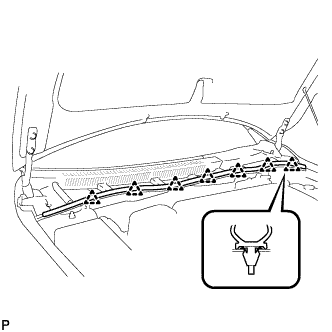 |
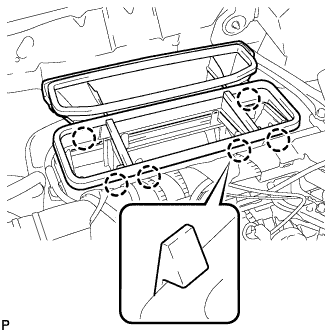
| 6. REMOVE CENTER NO. 1 COWL TOP VENTILATOR LOUVER |
Disengage the clip and 14 claws, and remove the center No. 1 cowl top ventilator louver.
 |
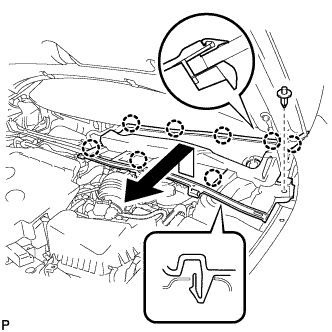
| 7. REMOVE COWL TOP VENTILATOR LOUVER LH |
Disengage the clip and 8 claws, and remove the cowl top ventilator louver LH.
 |
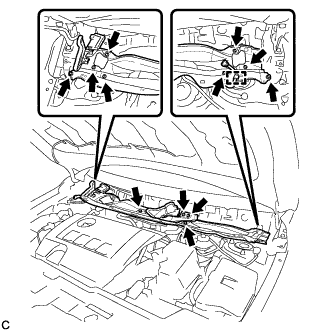
| 8. REMOVE WINDSHIELD WIPER MOTOR AND LINK ASSEMBLY |
Disconnect the connector.
 |
Remove the 2 bolts and the windshield wiper motor and link assembly.
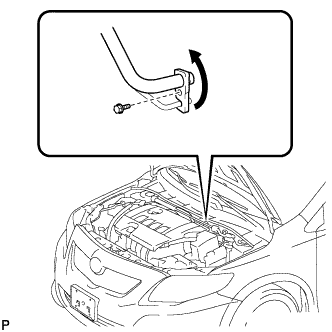
| 9. REMOVE OUTER COWL TOP PANEL (for TMC Made) |
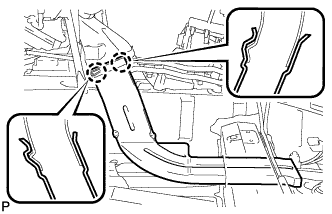
Disengage the clamp and bend the water guard plate RH as shown in the illustration.
 |
Disengage the clamp.
 |
Remove the 12 bolts and outer cowl top panel.
| 10. REMOVE OUTER COWL TOP PANEL (except TMC Made) |
Disengage the clamp and bend the water guard plate RH as shown in the illustration.
|
Disengage the clamp and bend the No. 1 heater air duct splash shield seal.
 |
Disengage the clamp.
 |
Remove the 12 bolts and outer cowl top panel.
| 11. DISCONNECT SUCTION PIPE SUB-ASSEMBLY |
Remove the bolt and slide the hook connector.
 |
Disconnect the suction pipe sub-assembly.
Remove the O-ring from the suction hose sub-assembly.
- NOTICE:
- Seal the openings of the disconnected parts using vinyl tape to prevent entry of moisture and foreign matter.
| 12. DISCONNECT AIR CONDITIONING TUBE ASSEMBLY |
Disconnect the air conditioning tube assembly.
Remove the O-ring from the air conditioning tube assembly.
- NOTICE:
- Seal the openings of the disconnected parts using vinyl tape to prevent entry of moisture and foreign matter.
| 13. DISCONNECT HEATER OUTLET WATER HOSE |
Using pliers, grip the claws of the clip and slide the clip to disconnect the heater outlet water hose.
- NOTICE:
- Do not apply excessive force to the heater outlet water hose.
- Prepare a drain pan or a piece of cloth in case the coolant leaks.
 |
| 14. DISCONNECT HEATER INLET WATER HOSE |
- HINT:
- Disconnection procedure for the heater inlet water hose is the same as that for the heater outlet water hose.
| 15. REMOVE POWER STEERING ECU ASSEMBLY (for 2AZ-FE) |
| 16. REMOVE POWER STEERING ECU ASSEMBLY (for 2ZR-FE) |
| 17. REMOVE STEERING POST ASSEMBLY |
| 18. REMOVE LOWER INSTRUMENT PANEL SUB-ASSEMBLY |
| 19. REMOVE SMART KEY ECU ASSEMBLY (w/ Smart Key System) |
| 20. REMOVE NO. 1 AIR DUCT SUB-ASSEMBLY |
Remove the 2 nuts and the No. 1 air duct sub-assembly.
 |
| 21. REMOVE LOWER DEFROSTER NOZZLE ASSEMBLY |
Disengage the 6 claws and remove the lower defroster nozzle assembly.
 |
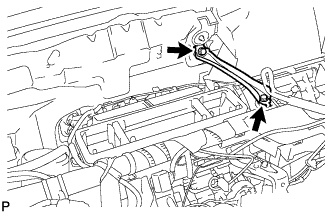
| 22. REMOVE CENTER INSTRUMENT PANEL TO COWL BRACE |
Remove the 2 bolts and the center instrument panel to cowl brace.
 |
| 23. REMOVE REAR NO. 2 AIR DUCT (w/ Rear Air Duct) |
Remove the clip.
 |
Turn back the floor carpet.
Disengage the 2 claws and remove the rear No. 2 air duct.
 |
| 24. REMOVE REAR NO. 3 AIR DUCT (w/ Rear Air Duct) |
Remove the clip.
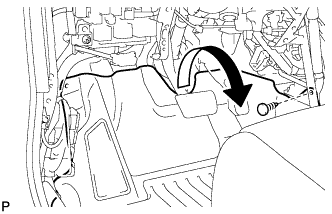 |
Turn back the floor carpet.
Disengage the 2 claws and remove the rear No. 3 air duct.
 |
| 25. REMOVE NO. 1 INSTRUMENT PANEL BRACE SUB-ASSEMBLY (for Manual Air Conditioning System) |
for TMC made:
Disconnect the connector.
Disengage each clamp.

except TMC made:
Disconnect the connector.
Disengage each clamp.

Remove the screw.
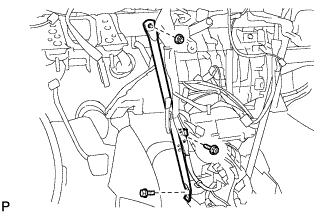 |
Remove the bolt, the nut, and the No. 1 instrument panel brace sub-assembly.
| 26. REMOVE NO. 1 INSTRUMENT PANEL BRACE SUB-ASSEMBLY (for Automatic Air Conditioning System) |
for TMC Made:
Disengage each clamp.
except TMC made:
Disengage each clamp.

Remove the screw.
|
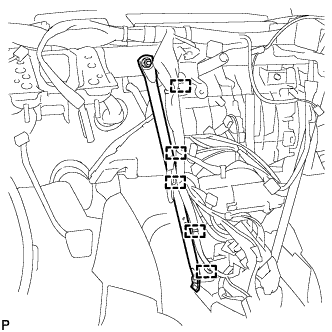
Remove the bolt, the nut, and the No. 1 instrument panel brace sub-assembly.
| 27. REMOVE NO. 2 INSTRUMENT PANEL BRACE SUB-ASSEMBLY |
for TMC Made:
Disengage each clamp.

except TMC made:
Disengage each clamp.
Remove the screw.
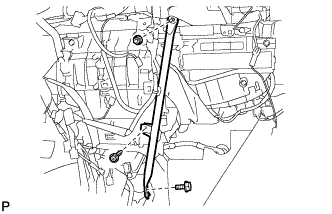 |
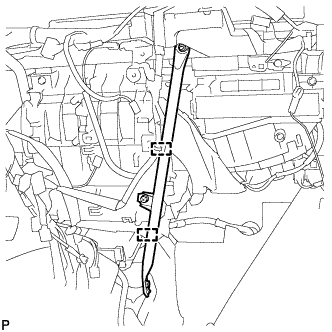
Remove the bolt, the nut, and the No. 2 instrument panel brace sub-assembly.
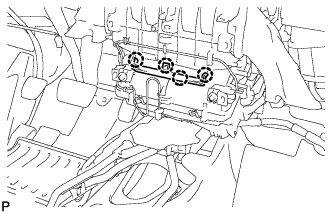
| 28. REMOVE HEATER COVER (w/ Cover) |
Disengage the 4 claws and remove the heater cover.
 |
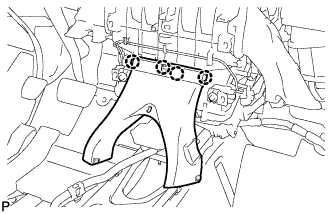
| 29. REMOVE REAR NO. 1 AIR DUCT (w/ Rear Air Duct) |
Disengage the 4 claws and remove the rear No. 1 air duct.
 |
| 30. REMOVE INSTRUMENT PANEL REINFORCEMENT ASSEMBLY (for Manual Air Conditioning System) |
Disconnect the connector.
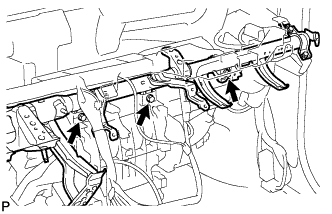
Disengage each clamp and the wire harness.
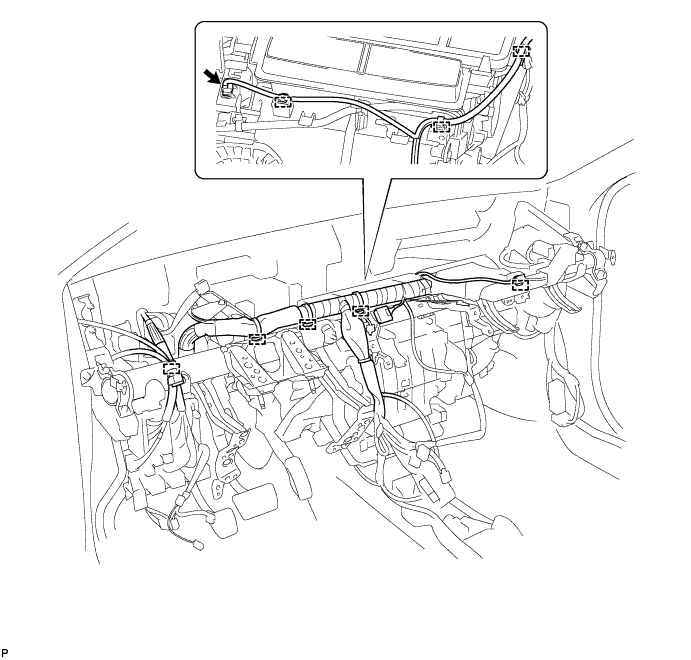
Disconnect each connector.
Disengage each clamp.
Remove the 12 bolts, and disengage the wire harness and junction block.
Disengage the cooler drain hose.

Remove the 7 bolts.
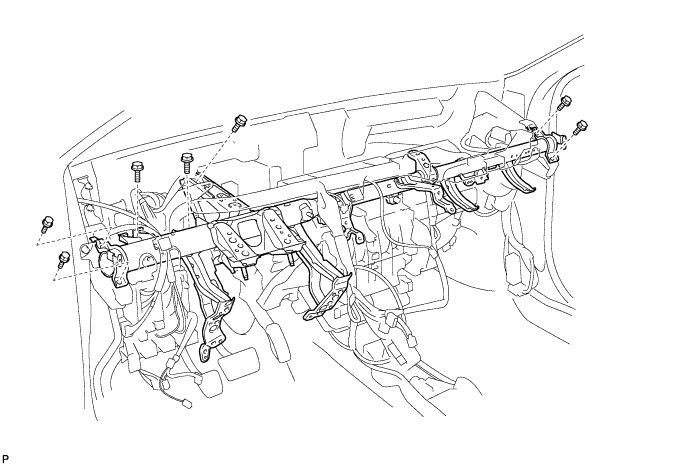
Remove the 3 bolts and the instrument panel reinforcement assembly.
 |
| 31. REMOVE INSTRUMENT PANEL REINFORCEMENT ASSEMBLY (for Automatic Air Conditioning System) |
Disengage each clamp and the wire harness.
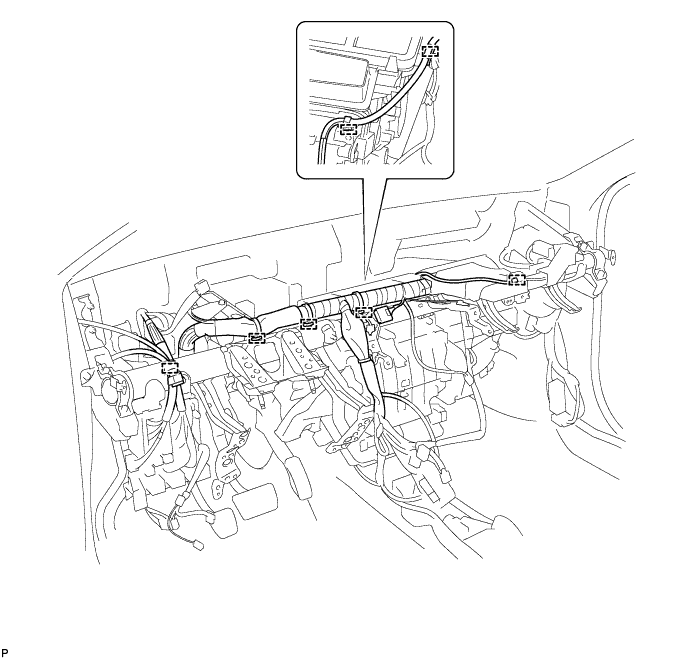
Disconnect each connector.
Disengage each clamp.
Remove the 12 bolts, and disengage the wire harness and junction block.
Disengage the cooler drain hose.

Remove the 7 bolts.
Remove the 3 bolts and the instrument panel reinforcement assembly.
|
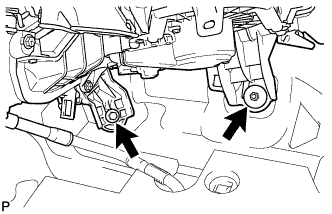
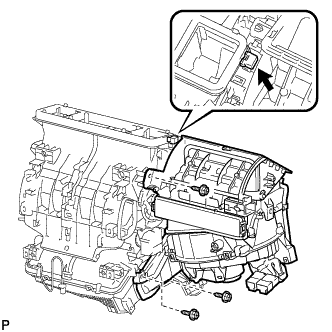
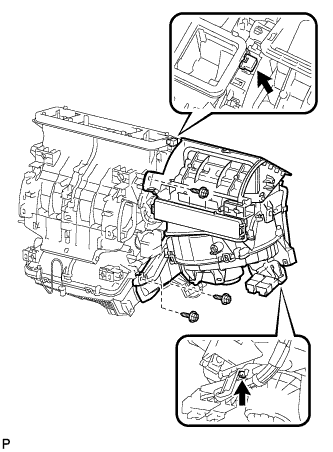
| 32. REMOVE AIR CONDITIONING UNIT |
Remove the bolt, the nut, and the air conditioning unit.
- NOTICE:
- Be sure to support the air conditioning unit assembly when removing it because failure to do so may cause the bracket of the air conditioning unit assembly to break.
- When disassembling the air conditioning unit, eliminate static electricity by touching the vehicle body to prevent the components from being damaged.
 |
| 33. REMOVE NO. 2 AIR DUCT SUB-ASSEMBLY |
Disengage the 2 claws and remove the No. 2 air duct sub-assembly.
 |
| 34. REMOVE BLOWER ASSEMBLY (w/o PTC Heater) |
for Automatic Air Conditioning System:
Disconnect the connector.
Remove the 3 screws and the blower assembly.
| 35. REMOVE BLOWER ASSEMBLY (w/ PTC Heater) |
Disengage each clamp.
 |
Remove the screw and disengage the quick heater connector.
 |
for Automatic Air Conditioning System:
Disconnect the connector.
Remove the 3 screws and the blower assembly.