Crankshaft Position Sensor Installation
INSTALL CRANK POSITION SENSOR
INSTALL GENERATOR ASSEMBLY
INSTALL V-RIBBED BELT
INSTALL ENGINE UNDER COVER RH
CONNECT CABLE TO NEGATIVE BATTERY TERMINAL
INSPECT FOR OIL LEAK
Crankshaft Position Sensor -- Installation |
| 1. INSTALL CRANK POSITION SENSOR |
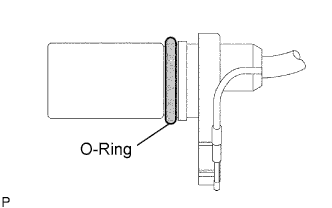
Apply a light coat of engine oil to the O-ring on the crank position sensor.
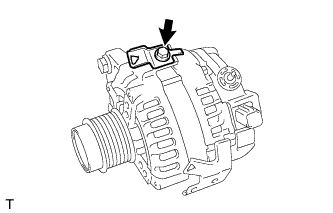
Install the crank position sensor with the bolt.
- Torque:
- 9.0 N*m{90 kgf*cm, 80 in.*lbf}
- NOTICE:
- Do not twist the O-ring.
Install the wire harness and crank position sensor connector clamp.
Connect the crank position sensor connector.
| 2. INSTALL GENERATOR ASSEMBLY |
Install the wire harness clamp bracket with the bolt.
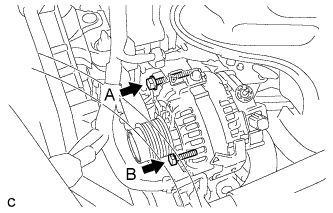
Install the generator assembly with the 2 bolts.
- Torque:
- Bolt A:
- 52 N*m{530 kgf*cm, 38 ft.*lbf}
- Bolt B:
- 21 N*m{215 kgf*cm, 16 ft.*lbf}
Install the wire harness to terminal B with the nut.
- Torque:
- 9.8 N*m{100 kgf*cm, 87 in.*lbf}
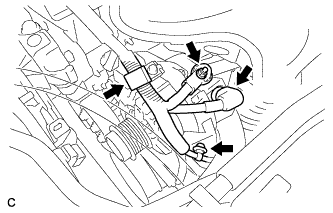
Attach the clamp and connect the generator connector to the generator.
Install the 2 wire harness clamps.
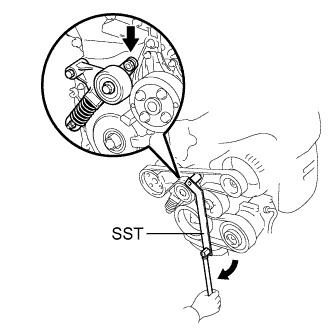
- HINT:
- The illustration shows the V-ribbed belt layout.
Using SST, slowly turn the V-ribbed belt tensioner clockwise and install the V-ribbed belt.
- SST
- 09216-42010(09216-04010)
- NOTICE:
- Make sure that SST and other tools are set to the tensioner securely.
- When compressing the V-ribbed belt tensioner, slowly turn the tensioner.
| 4. INSTALL ENGINE UNDER COVER RH |
| 5. CONNECT CABLE TO NEGATIVE BATTERY TERMINAL |
Connect the cable to the negative battery terminal.
- Torque:
- 5.4 N*m{55 kgf*cm, 48 in.*lbf}