Front Side Speaker -- Removal |
| 1. REMOVE FRONT DOOR LOWER FRAME BRACKET GARNISH |
Disengage the 2 clips and remove the front door lower frame bracket garnish.
 |
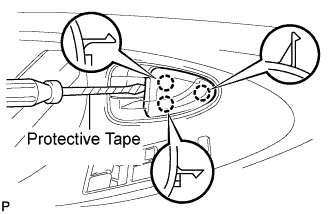
| 2. REMOVE FRONT DOOR INSIDE HANDLE BEZEL PLUG |
Using a screwdriver with the tip wrapped with protective tape, disengage the 3 claws, and remove the front door inside handle bezel plug.
 |
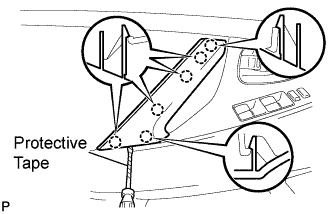
| 3. REMOVE ASSIST GRIP COVER |
Using a screwdriver with the tip wrapped with protective tape, disengage the 6 claws and remove the assist grip cover.
 |
| 4. REMOVE COURTESY LIGHT ASSEMBLY |
Using a screwdriver with the tip wrapped with protective tape, disengage the claw and remove the courtesy light assembly.
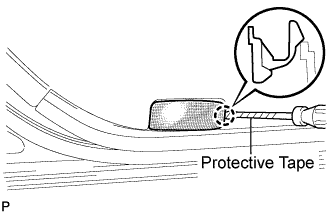 |
Disconnect the connector.
| 5. REMOVE FRONT DOOR TRIM BOARD SUB-ASSEMBLY |
Remove the 3 screws and clip (A).
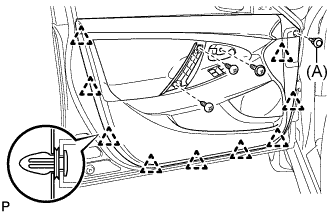 |
Using a clip remover, disengage the 9 clips.
Pull up the front door trim board in the direction indicated by the arrow.
 |
Disengage the reference bosses from the front door panel.
Raise the front door trim board to disengage the 4 claws and remove the front door trim board together with the front door inner glass weatherstrip.
Disengage the 2 claws and disconnect the front door inside handle sub-assembly.
 |
| 6. REMOVE FRONT DOOR INNER GLASS WEATHERSTRIP |
Using a screwdriver, disengage the 4 clips as shown in the illustration and remove the front door inner glass weatherstrip from the front door trim board.
 |
| 7. REMOVE FRONT NO. 1 SPEAKER ASSEMBLY |
Disconnect the connector.
 |
Remove the 4 bolts and front No. 1 speaker assembly.
- NOTICE:
- Do not touch the cone part of the speaker.
| 8. REMOVE FRONT PILLAR GARNISH |
Pull the upper part of the garnish toward the inside of the cabin and disengage the 2 clips.
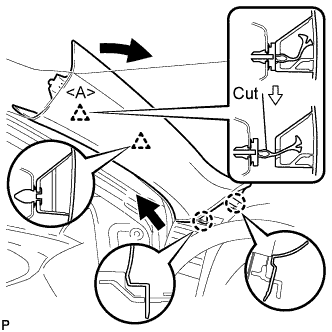 |
Cut off the clip <A>.
Disengage the 2 claws and remove the front pillar garnish LH.
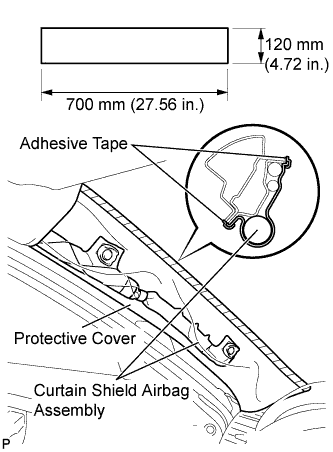
Remove the clip <A> from the vehicle body.
Protect the curtain shield airbag assembly.
Cover the airbag with a 700 mm (27.56 in.) x 120 mm (4.72 in.) cloth or piece of nylon and fix the ends of the cover with tape, as shown in the illustration.
- NOTICE:
- Cover the curtain shield airbag with a protective cover as soon as the front pillar garnish is removed.
 |
| 9. REMOVE INSTRUMENT PANEL NO. 2 SPEAKER PANEL SUB-ASSEMBLY |
Engage the 6 claws and 2 clips.
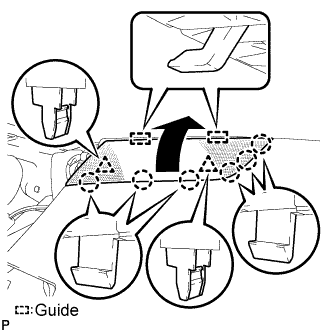 |
Remove the instrument panel No. 2 speaker panel sub-assembly.
| 10. REMOVE FRONT NO. 2 SPEAKER ASSEMBLY |
Remove the 2 bolts and front No. 2 speaker assembly.
 |
Disconnect the connector.