Floor Shift Lever Assembly Removal
REMOVE SHIFT LEVER KNOB SUB-ASSEMBLY
REMOVE NO. 1 INSTRUMENT CLUSTER FINISH PANEL GARNISH
REMOVE NO. 2 INSTRUMENT CLUSTER FINISH PANEL GARNISH
REMOVE UPPER CONSOLE PANEL
REMOVE UPPER CONSOLE REAR PANEL SUB-ASSEMBLY
DISCONNECT TRANSMISSION CONTROL CABLE ASSEMBLY
REMOVE FLOOR SHIFT LEVER ASSEMBLY
Floor Shift Lever Assembly -- Removal |
| 1. REMOVE SHIFT LEVER KNOB SUB-ASSEMBLY |
Turn the shift lever knob counterclockwise and remove the shift lever knob sub-assembly.
| 2. REMOVE NO. 1 INSTRUMENT CLUSTER FINISH PANEL GARNISH |
Disengage the 2 clips and remove the No. 1 instrument cluster finish panel garnish.
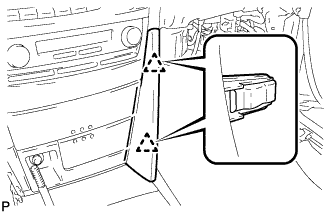
| 3. REMOVE NO. 2 INSTRUMENT CLUSTER FINISH PANEL GARNISH |
Disengage the 2 clips and remove the No. 2 instrument cluster finish panel garnish.
| 4. REMOVE UPPER CONSOLE PANEL |
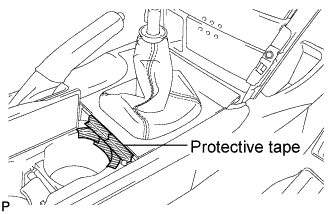
Open the lid of the upper console panel.
Apply protective tape to the area shown in the illustration.
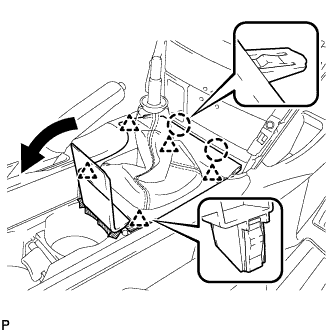
Using a moulding remover, disengage the 2 claws and the 5 clips, and then remove the upper console panel as shown in the illustration.
| 5. REMOVE UPPER CONSOLE REAR PANEL SUB-ASSEMBLY |
Disengage the 3 claws and the 5 clips, and remove the upper console rear panel sub-assembly.
| 6. DISCONNECT TRANSMISSION CONTROL CABLE ASSEMBLY |
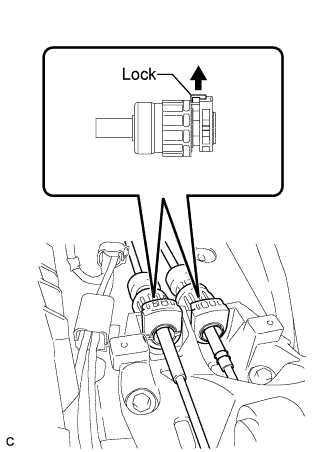
Remove the 2 clips and disconnect the end of the transmission control cable.
Pull out the control cable assembly locks.
Turn the adjust nut 180° clockwise. While holding the adjust nut, separate the control cable assembly.
| 7. REMOVE FLOOR SHIFT LEVER ASSEMBLY |
Remove the 4 bolts and shift lever assembly.