Floor Shift Lever Assembly Installation
INSTALL FLOOR SHIFT LEVER ASSEMBLY
INSTALL TRANSMISSION CONTROL CABLE ASSEMBLY
INSTALL UPPER CONSOLE REAR PANEL SUB-ASSEMBLY
INSTALL UPPER CONSOLE PANEL
INSTALL NO. 2 INSTRUMENT CLUSTER FINISH PANEL GARNISH
INSTALL NO. 1 INSTRUMENT CLUSTER FINISH PANEL GARNISH
INSTALL SHIFT LEVER KNOB SUB-ASSEMBLY
Floor Shift Lever Assembly -- Installation |
| 1. INSTALL FLOOR SHIFT LEVER ASSEMBLY |
Install the shift lever assembly with the 4 bolts.
- Torque:
- 12 N*m{122 kgf*cm, 9 ft.*lbf}
| 2. INSTALL TRANSMISSION CONTROL CABLE ASSEMBLY |
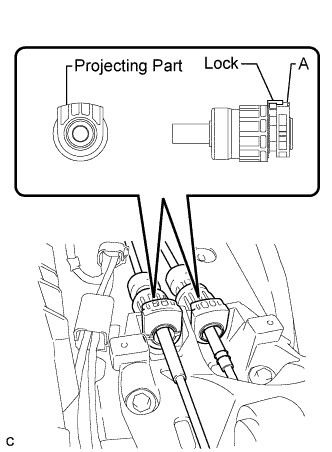
Connect the control cable to the shift lever retainer.
- NOTICE:
- The projecting part of the cable outer should face upward when the shift cable is connected.
- After installation, make sure that the cable outer lock is projecting from A as shown in the illustration.
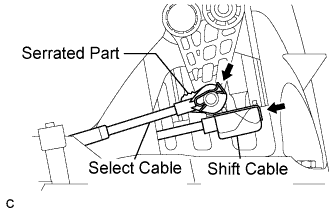
Connect the end of the shift cable to the shift lever assembly with the clip.
Connect the end of the select cable to the shift lever assembly with a new clip.
- NOTICE:
- The serrated part of the select cable point should face upward when the select cable point is connected.
- The clip should be installed in the direction as shown in the illustration.
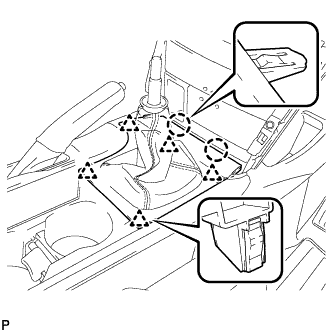
| 3. INSTALL UPPER CONSOLE REAR PANEL SUB-ASSEMBLY |
Engage the 3 claws and 5 clips to install the upper console rear panel sub-assembly.
| 4. INSTALL UPPER CONSOLE PANEL |
Engage the 2 claws and the 5 clips to install the upper console panel as shown in the illustration.
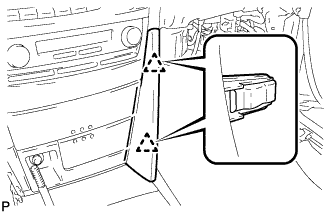
| 5. INSTALL NO. 2 INSTRUMENT CLUSTER FINISH PANEL GARNISH |
Engage the 2 clips and install the No. 2 instrument cluster finish panel garnish.
| 6. INSTALL NO. 1 INSTRUMENT CLUSTER FINISH PANEL GARNISH |
Engage the 2 clips and install the No. 1 instrument cluster finish panel garnish.
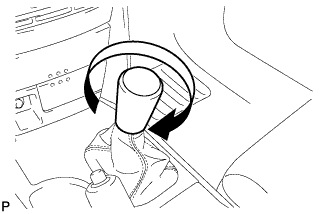
| 7. INSTALL SHIFT LEVER KNOB SUB-ASSEMBLY |
Install the shift lever knob sub-assembly.