Land Cruiser URJ200 URJ202 GRJ200 VDJ200 - 1VD-FTV ENGINE CONTROL
ENGINE COOLANT TEMPERATURE SENSOR - REMOVAL
| 1. REMOVE FRONT FENDER SPLASH SHIELD SUB-ASSEMBLY LH |
Remove the 3 bolts and screw.
Loosen the clip and remove the front fender splash shield LH.
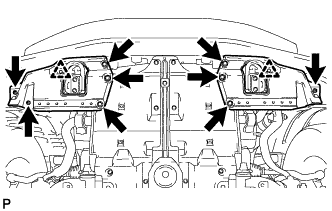
| 2. REMOVE FRONT FENDER SPLASH SHIELD SUB-ASSEMBLY RH |
Remove the 3 bolts and 2 screws.
Loosen the clip and remove the front fender splash shield RH.
| 3. REMOVE NO. 1 ENGINE UNDER COVER SUB-ASSEMBLY |
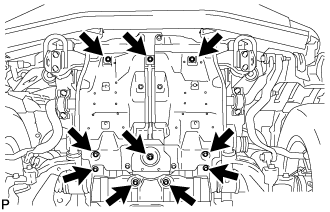
Remove the 10 bolts and No. 1 engine under cover.
| 4. DRAIN ENGINE COOLANT |
- CAUTION:
- Do not remove the radiator reservoir cap while the engine and radiator are still hot. Pressurized, hot engine coolant and steam may be released and cause serious burns.
- HINT:
- Collect the coolant in a container and dispose of it according to the regulations in your area.
Loosen the radiator drain cock plug.
Remove the radiator reservoir cap to drain the coolant in the radiator.
Loosen the oil filter bracket drain cock plug to drain the coolant in the engine.
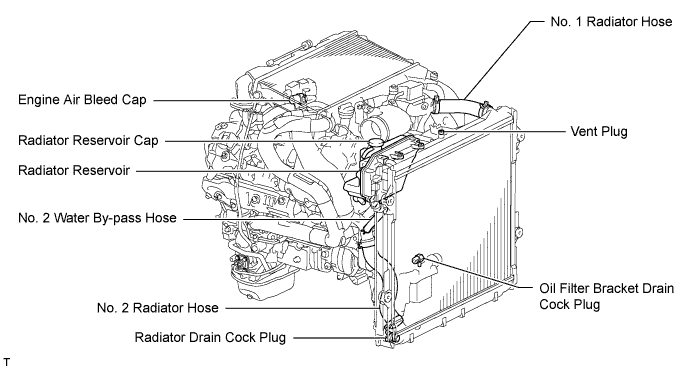
Tighten the radiator drain cock plug by hand.
Tighten the oil filter bracket drain cock plug.
- Torque:
- 13 N*m{ 133 kgf*cm, 10 ft.*lbf}
| 5. REMOVE NO. 1 ENGINE COVER SUB-ASSEMBLY (w/ Intercooler) |

Install the engine cover with the 2 nuts.
- Torque:
- 8.0 N*m{ 82 kgf*cm, 71 in.*lbf}
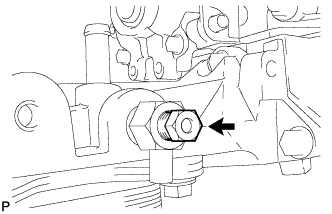
| 6. REMOVE ENGINE COOLANT TEMPERATURE SENSOR |

Disconnect the sensor connector.
Using a 19 mm deep socket wrench, remove the sensor and gasket.