REMOVE RADIO RECEIVER ASSEMBLY WITH BRACKET (for Radio Receiver Type)
REMOVE RADIO AND DISPLAY RECEIVER ASSEMBLY WITH BRACKET (for Radio and Display Type)
REMOVE NO. 1 RADIO RECEIVER BRACKET (for Radio and Display Type)
REMOVE NO. 2 RADIO RECEIVER BRACKET (for Radio and Display Type)
Radio Receiver -- Removal |
| 1. DISCONNECT CABLE FROM NEGATIVE BATTERY TERMINAL |
- NOTICE:
- When disconnecting the cable, some systems need to be initialized after the cable is reconnected (Toyota Fortuner RM000004W63000X.html).
| 2. REMOVE CENTER INSTRUMENT CLUSTER FINISH PANEL ASSEMBLY |
 |
for Manual Air Conditioning System:
Put protective tape around the center instrument cluster finish panel.
Text in Illustration *1 Protective Tape Using a moulding remover, detach the 10 claws and 4 clips.
Detach the 4 claws and disconnect the air conditioner control.
Disconnect the connectors and remove the center instrument cluster finish panel.
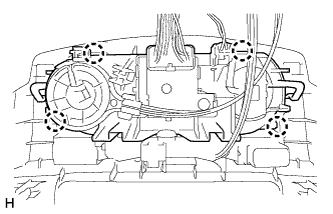
for Automatic Air Conditioning System:
Put protective tape around the center instrument cluster finish panel.
Text in Illustration *1 Protective Tape Using a moulding remover, detach the 8 claws and 4 clips.
Disconnect the connectors and remove the center instrument cluster finish panel.
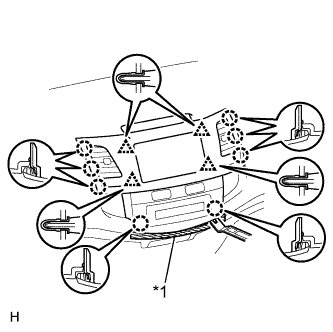 |
| 3. REMOVE RADIO RECEIVER ASSEMBLY WITH BRACKET (for Radio Receiver Type) |
Remove the 4 screws.
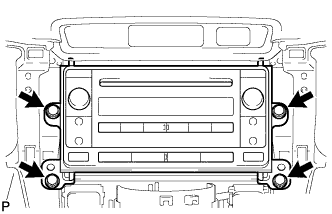 |
Disconnect all the connectors and remove the radio receiver assembly with bracket.
| 4. REMOVE RADIO AND DISPLAY RECEIVER ASSEMBLY WITH BRACKET (for Radio and Display Type) |
Remove the 4 screws.
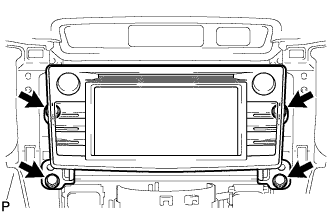 |
Disconnect all the connectors and remove the radio receiver assembly with bracket.
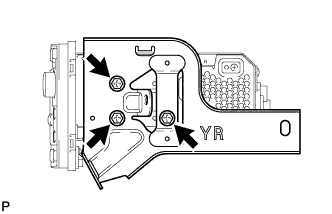
| 5. REMOVE NO. 1 RADIO BRACKET (for Radio Receiver Type) |
Remove the 3 screws and No. 1 radio bracket from the radio receiver.
 |
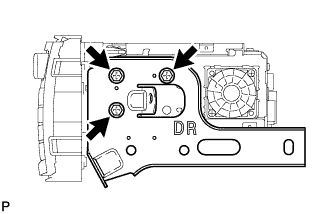
| 6. REMOVE NO. 1 RADIO RECEIVER BRACKET (for Radio and Display Type) |
Remove the 3 screws and No. 1 radio bracket from the radio receiver.
 |
| 7. REMOVE NO. 2 RADIO BRACKET (for Radio Receiver Type) |
Remove the 4 screws and No. 2 radio bracket from the radio receiver.
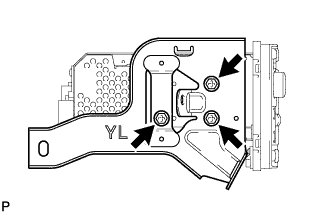 |
| 8. REMOVE NO. 2 RADIO RECEIVER BRACKET (for Radio and Display Type) |
Remove the 3 screws and No. 2 radio bracket from the radio receiver.
 |