Transmission Control Cable Removal
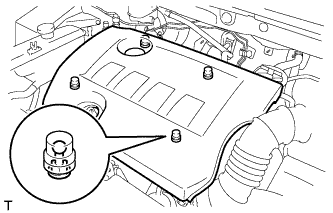
REMOVE NO. 2 CYLINDER HEAD COVER
REMOVE AIR CLEANER CAP SUB-ASSEMBLY
REMOVE AIR CLEANER CASE
REMOVE NO. 1 CONSOLE UPPER PANEL GARNISH
REMOVE NO. 2 CONSOLE UPPER PANEL GARNISH
REMOVE SHIFT LEVER KNOB SUB-ASSEMBLY
REMOVE UPPER CONSOLE PANEL SUB-ASSEMBLY
REMOVE SWITCH BASE
REMOVE CONSOLE CUP HOLDER BOX
REMOVE UPPER REAR CONSOLE PANEL SUB-ASSEMBLY
REMOVE CONSOLE REAR END PANEL
REMOVE REAR CONSOLE BOX SUB-ASSEMBLY
DISCONNECT TRANSAXLE CONTROL CABLE ASSEMBLY
REMOVE TRANSAXLE CONTROL CABLE ASSEMBLY
Transmission Control Cable -- Removal |
| 1. REMOVE NO. 2 CYLINDER HEAD COVER |
Hold the rear of the cover and raise it to detach the 2 clips on the rear of the cover. Continue to raise the cover to detach the 2 clips on the front of the cover and remove the cover.
- NOTICE:
- Attempting to detach both front and rear clips at the same time may cause the cover to break.
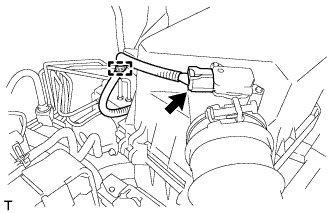
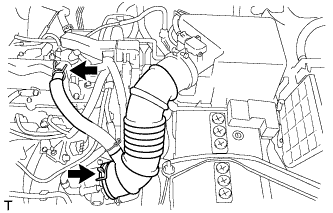
| 2. REMOVE AIR CLEANER CAP SUB-ASSEMBLY |
Disconnect the mass air flow meter connector.
Detach the clamp.
Disconnect the No. 2 ventilation hose from the cylinder head cover.
Squeeze the taps of the air cleaner hose clamp, and then disconnect the air cleaner hose from the throttle body.
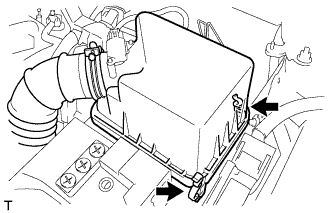
Detach the 2 hook clamps, and then remove the air cleaner cap and hose.
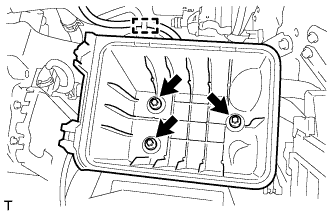
| 3. REMOVE AIR CLEANER CASE |
Disconnect the wire harness clamp from the air cleaner case.
Remove the 3 bolts and air cleaner case.
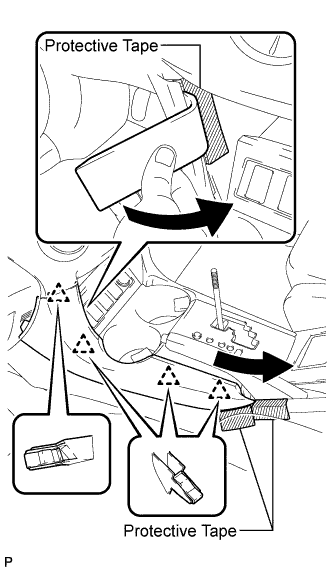
| 4. REMOVE NO. 1 CONSOLE UPPER PANEL GARNISH |
Place protective tape as shown in the illustration.
Using a moulding remover, detach the 4 clips and remove the upper panel garnish.
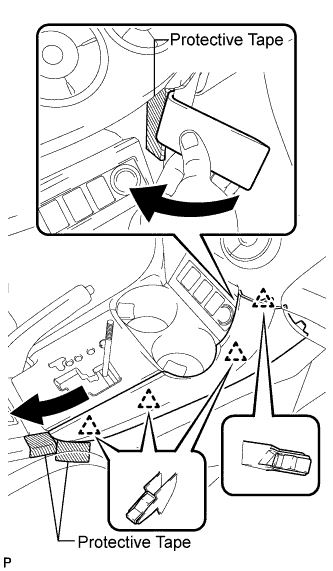
| 5. REMOVE NO. 2 CONSOLE UPPER PANEL GARNISH |
Place protective tape as shown in the illustration.
Using a moulding remover, detach the 4 clips and remove the upper panel garnish.
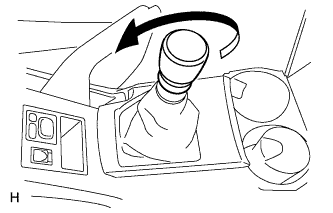
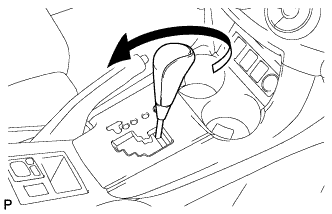
| 6. REMOVE SHIFT LEVER KNOB SUB-ASSEMBLY |
for Manual Transaxle:
Twist the shift lever knob in the direction indicated by the arrow and remove it.
for Automatic Transaxle:
Twist the shift lever knob in the direction indicated by the arrow and remove it.
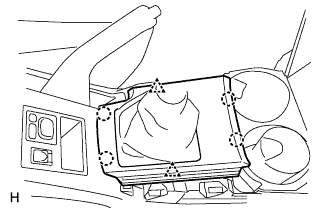
| 7. REMOVE UPPER CONSOLE PANEL SUB-ASSEMBLY |
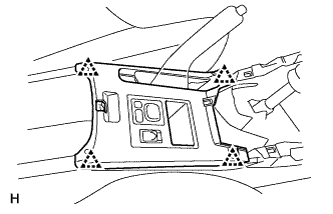
Using a screwdriver, detach the 2 clips and 4 claws, and then remove the upper console panel.
- HINT:
- Tape the screwdriver tip before use.
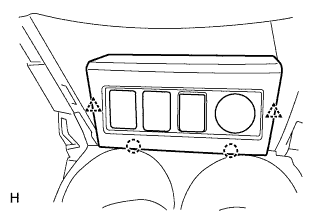
Detach the 2 clips and 2 claws.
Disconnect the connectors and remove the switch base.
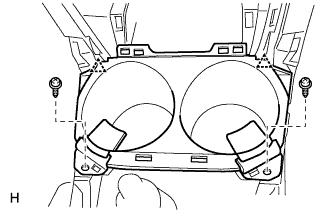
| 9. REMOVE CONSOLE CUP HOLDER BOX |
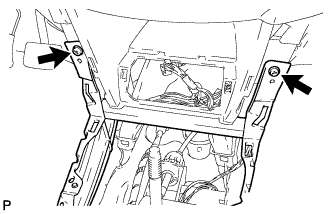
Remove the 2 screws.
Detach the 2 clips and remove the cup holder box.
| 10. REMOVE UPPER REAR CONSOLE PANEL SUB-ASSEMBLY |
Using a screwdriver, detach the 4 clips.
- HINT:
- Tape the screwdriver tip before use.
Disconnect the connectors and remove the upper rear console panel.
| 11. REMOVE CONSOLE REAR END PANEL |
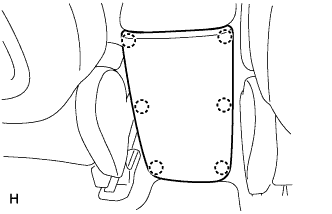
Using a screwdriver, detach the 6 claws and remove the console rear end panel.
- HINT:
- Tape the screwdriver tip before use.
| 12. REMOVE REAR CONSOLE BOX SUB-ASSEMBLY |
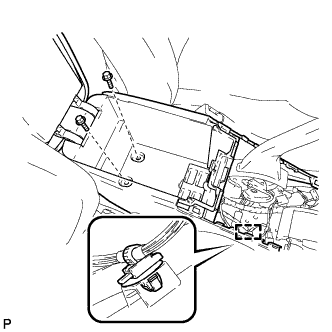
Remove the 2 bolts and detach the wire harness clamp.
Remove the 2 screws.
Disconnect the connector and remove the rear console box.
| 13. DISCONNECT TRANSAXLE CONTROL CABLE ASSEMBLY |
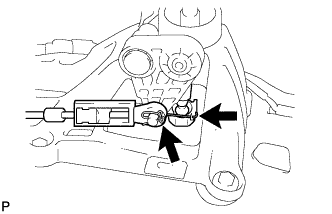
Remove the 2 clips and disconnect the cable ends of the control cable.
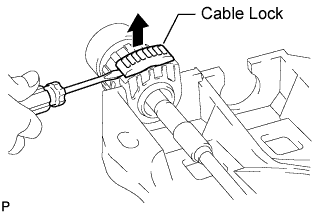
Using a screwdriver, release the cable locks of the shift cable and select cable.
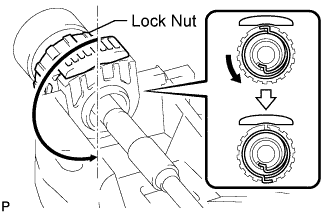
Turn the lock nuts 180° counterclockwise and hold them in that position. Remove the shift cable and select cable while holding them.
Remove the shift cable from the floor shift shift lever assembly while holding the lock nut.
Repeat the step above for the select cable.
- NOTICE:
- Do not push in the cable locks.
| 14. REMOVE TRANSAXLE CONTROL CABLE ASSEMBLY |
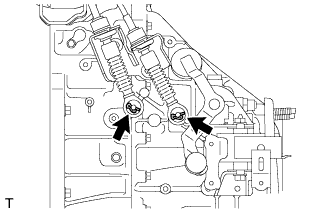
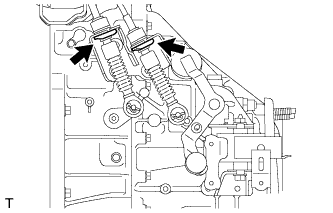
Remove the 2 clips and disconnect the 2 cables from the transaxle.
Remove the 2 clips and disconnect the 2 cables from the control cable bracket.
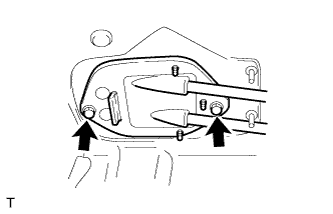
Remove the 2 bolts from the retainer.
Pull out the control cable from the floor.
