REMOVE FRONT DOOR WINDOW REGULATOR HANDLE ASSEMBLY (w/o Power Window)
REMOVE FRONT DOOR LOWER FRAME BRACKET GARNISH (w/ Front No. 2 Speaker)
REMOVE FRONT NO. 2 SPEAKER ASSEMBLY (w/ Front No. 2 Speaker)
Front Door Speaker -- Removal |
| 1. REMOVE FRONT DOOR WINDOW REGULATOR HANDLE ASSEMBLY (w/o Power Window) |
Using a clip remover, remove the snap ring.
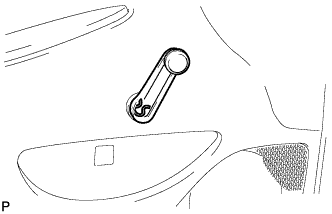 |
Remove the front door window regulator handle assembly and front door regulator inside handle plate.
| 2. REMOVE FRONT DOOR INSIDE HANDLE BEZEL |
Using a moulding remover, disengage the 3 claws and remove the front door inside handle bezel.
 |
| 3. REMOVE FRONT ARMREST UPPER BASE PANEL (w/o Power Window) |
Using a moulding remover, disengage the 2 clips and 6 claws, and remove the front armrest upper base panel.
 |
w/ Power Door Lock:
Disconnect the connector.
| 4. REMOVE FRONT ARMREST UPPER BASE PANEL (w/ Power Window) |
Using a moulding remover, disengage the 2 clips and 6 claws.
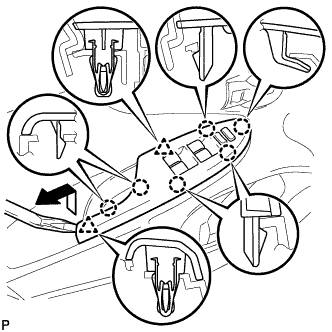 |
Disconnect the connector and remove the front armrest upper base panel.
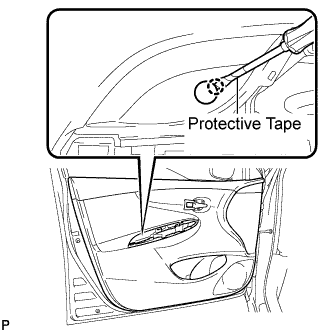
| 5. REMOVE FRONT DOOR TRIM BOARD SUB-ASSEMBLY |
Using a screwdriver with its tip wrapped with protective tape, disengage the claw and disconnect the door armrest cap.
 |
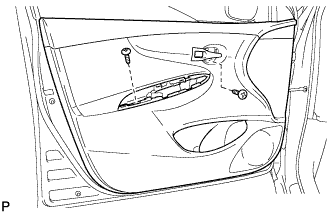
Remove the 2 screws.
 |
Using a clip remover, disengage the 10 clips.
 |
Disengage the 5 claws and separate the front door trim board sub-assembly from the front door inner glass weatherstrip.
Disengage the 2 claws and disconnect the front door inside handle sub-assembly.
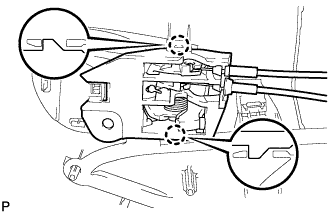 |
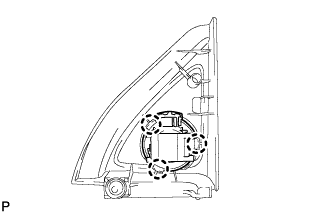
| 6. REMOVE FRONT NO. 1 SPEAKER ASSEMBLY |
Disconnect the connector.
 |
Using a drill bit with a diameter of less than 4 mm (0.158 in.), drill out the 3 rivet heads and remove the front No. 1 speaker assembly.
- NOTICE:
- Do not touch the cone part of the speaker.
- Do not drill the rivet at an angle as this will cause damage to the drill and drill hole. Line up the drill and rivet, and carefully drill out the rivet head.
- Be careful as the cut rivet will be very hot.
Continue drilling and push out the remaining rivet fragments.
Using a vacuum cleaner, remove the rivet fragments and shavings from the inside of the door.
| 7. REMOVE FRONT DOOR LOWER FRAME BRACKET GARNISH (w/ Front No. 2 Speaker) |
Disengage the clip and clamp.
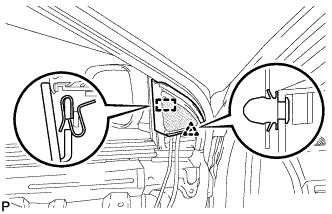 |
Disconnect the connector and remove the front door lower frame bracket garnish.
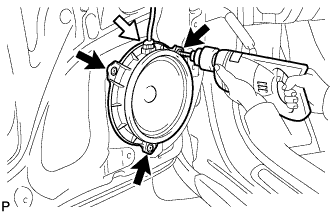
| 8. REMOVE FRONT NO. 2 SPEAKER ASSEMBLY (w/ Front No. 2 Speaker) |
Disengage the 3 claws and remove the front No. 2 speaker assembly.
 |