REMOVE LOWER INSTRUMENT PANEL FINISH PANEL (w/o Entry and Start System)
REMOVE LOWER INSTRUMENT PANEL FINISH PANEL (w/ Entry and Start System)
Stop Light Switch -- Removal |
- HINT:
- Use the same procedure for the RH side and LH side.
- The procedures listed below are for the LH side.
| 1. REMOVE FRONT DOOR SCUFF PLATE LH |
Disengage the 7 claws and 3 clips, and remove the front door scuff plate LH.
 |
| 2. REMOVE COWL SIDE TRIM SUB-ASSEMBLY LH |
Remove the cowl side trim clip.
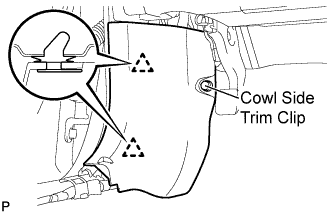 |
Disengage the 2 clips and remove the cowl side trim sub-assembly LH.
| 3. REMOVE LOWER INSTRUMENT PANEL FINISH PANEL LH |
Remove the bolt <A> and the screw <B>.
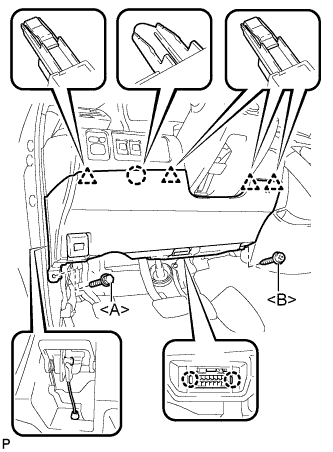 |
Disengage the 2 claws and the DLC3.
Disconnect the hood lock control cable assembly.
Disengage the claw and the 4 clips.
Remove the air hose, disconnect the connector, and then remove the lower instrument panel finish panel LH.
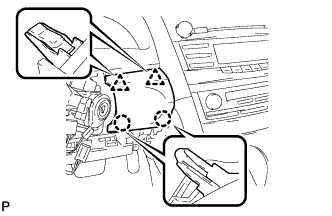
| 4. REMOVE NO. 1 INSTRUMENT PANEL SUB-ASSEMBLY |
Disengage the 3 claws and the 2 clips.
 |
Disconnect each connector and remove the instrument panel sub-assembly.
| 5. REMOVE LOWER INSTRUMENT PANEL FINISH PANEL (w/o Entry and Start System) |
Disengage the 2 claws and 2 clips, and then remove the lower instrument panel finish panel.
 |
| 6. REMOVE LOWER INSTRUMENT PANEL FINISH PANEL (w/ Entry and Start System) |
Disengage the 2 claws and 2 clips, and then remove the lower instrument panel finish panel.
 |
Disconnect the connector.
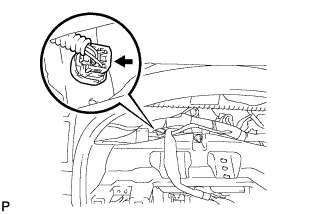
| 7. REMOVE INSTRUMENT CLUSTER FINISH PANEL NO.1 |
Remove the 2 clips.
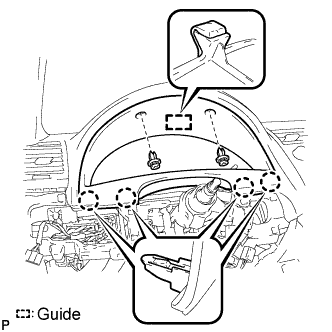 |
Disengage the guide and 4 claws and then remove the instrument cluster finish panel.
| 8. REMOVE COMBINATION METER |
Remove the 4 screws <E>.
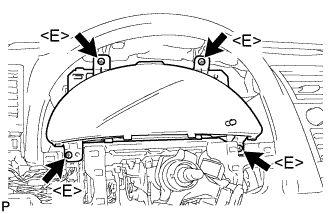 |
Disconnect each connector and remove the combination meter assembly.
| 9. REMOVE STOP LIGHT SWITCH |
Disconnect the stop light switch connector from the stop light switch.
 |
Turn the stop light switch counterclockwise and remove the stop light switch.
 |