Ultrasonic Sensor (For Front Side) -- Removal |
| 1. REMOVE COOL AIR INTAKE DUCT SEAL (for 2GR-FE) |
Remove the 7 clips and cool air intake duct seal.
 |
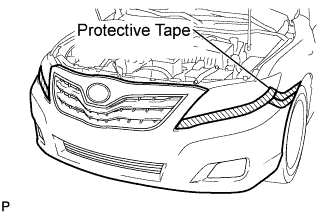
| 2. REMOVE FRONT BUMPER ASSEMBLY |
Put protective tape around the front bumper assembly.
 |
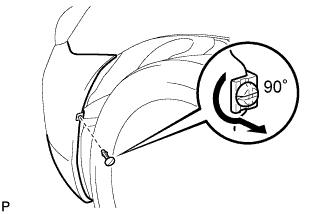
Using a screwdriver, turn the pin 90 degrees and remove the pin hold clip.
- HINT:
- Use the same procedure for the RH side and LH side.
 |
Remove the 8 screws, 2 clips, 2 radiator grille protectors and bolt.
 |
Disengage the 2 claws and disconnect the front bumper assembly as shown in the illustration.
- HINT:
- Use the same procedure for the RH side and LH side.
 |
Disconnect each connector.
w/ TOYOTA Parking Assist-sensor System:
Disengage the clamp and disconnect the No. 1 ultrasonic sensor connector.
w/ Headlight Cleaner System:
Disconnect the headlight cleaner washer hose.
Remove the front bumper assembly.
 |
| 3. REMOVE NO. 1 ULTRASONIC SENSOR |
Disconnect the sensor connector.
While pushing down on the lever with a finger to release the claw, disengage the claw on the other side to remove the No. 1 ultrasonic sensor.
- HINT:
- The type of the claw on the top and bottom of the sensor are different. Observe the claws carefully before attempting to remove the sensor.
- The illustration is for the LH side. The RH side is the opposite of the LH side.
 |
| 4. REMOVE NO. 1 ULTRASONIC SENSOR RETAINER |
Disengage the 2 claws and remove the No. 1 ultrasonic sensor retainer from the front bumper.
- HINT:
- The illustration is for the LH side. The RH side is the opposite of the LH side.
 |